• Email
    • Facebook
    • Instagram
    • Pinterest
    • Twitter

Girl and Her Kitchen

Plan. Make. Eat. Design. Craft. Create. Celebrate. Life.

  • Home
  • About the Girl
  • Recipe Index
  • We LOVE
  • Weekly Menu

Chicken & Turkey Main Dishes Pasta

Greek Chicken Pasta

mediterraneanpasta

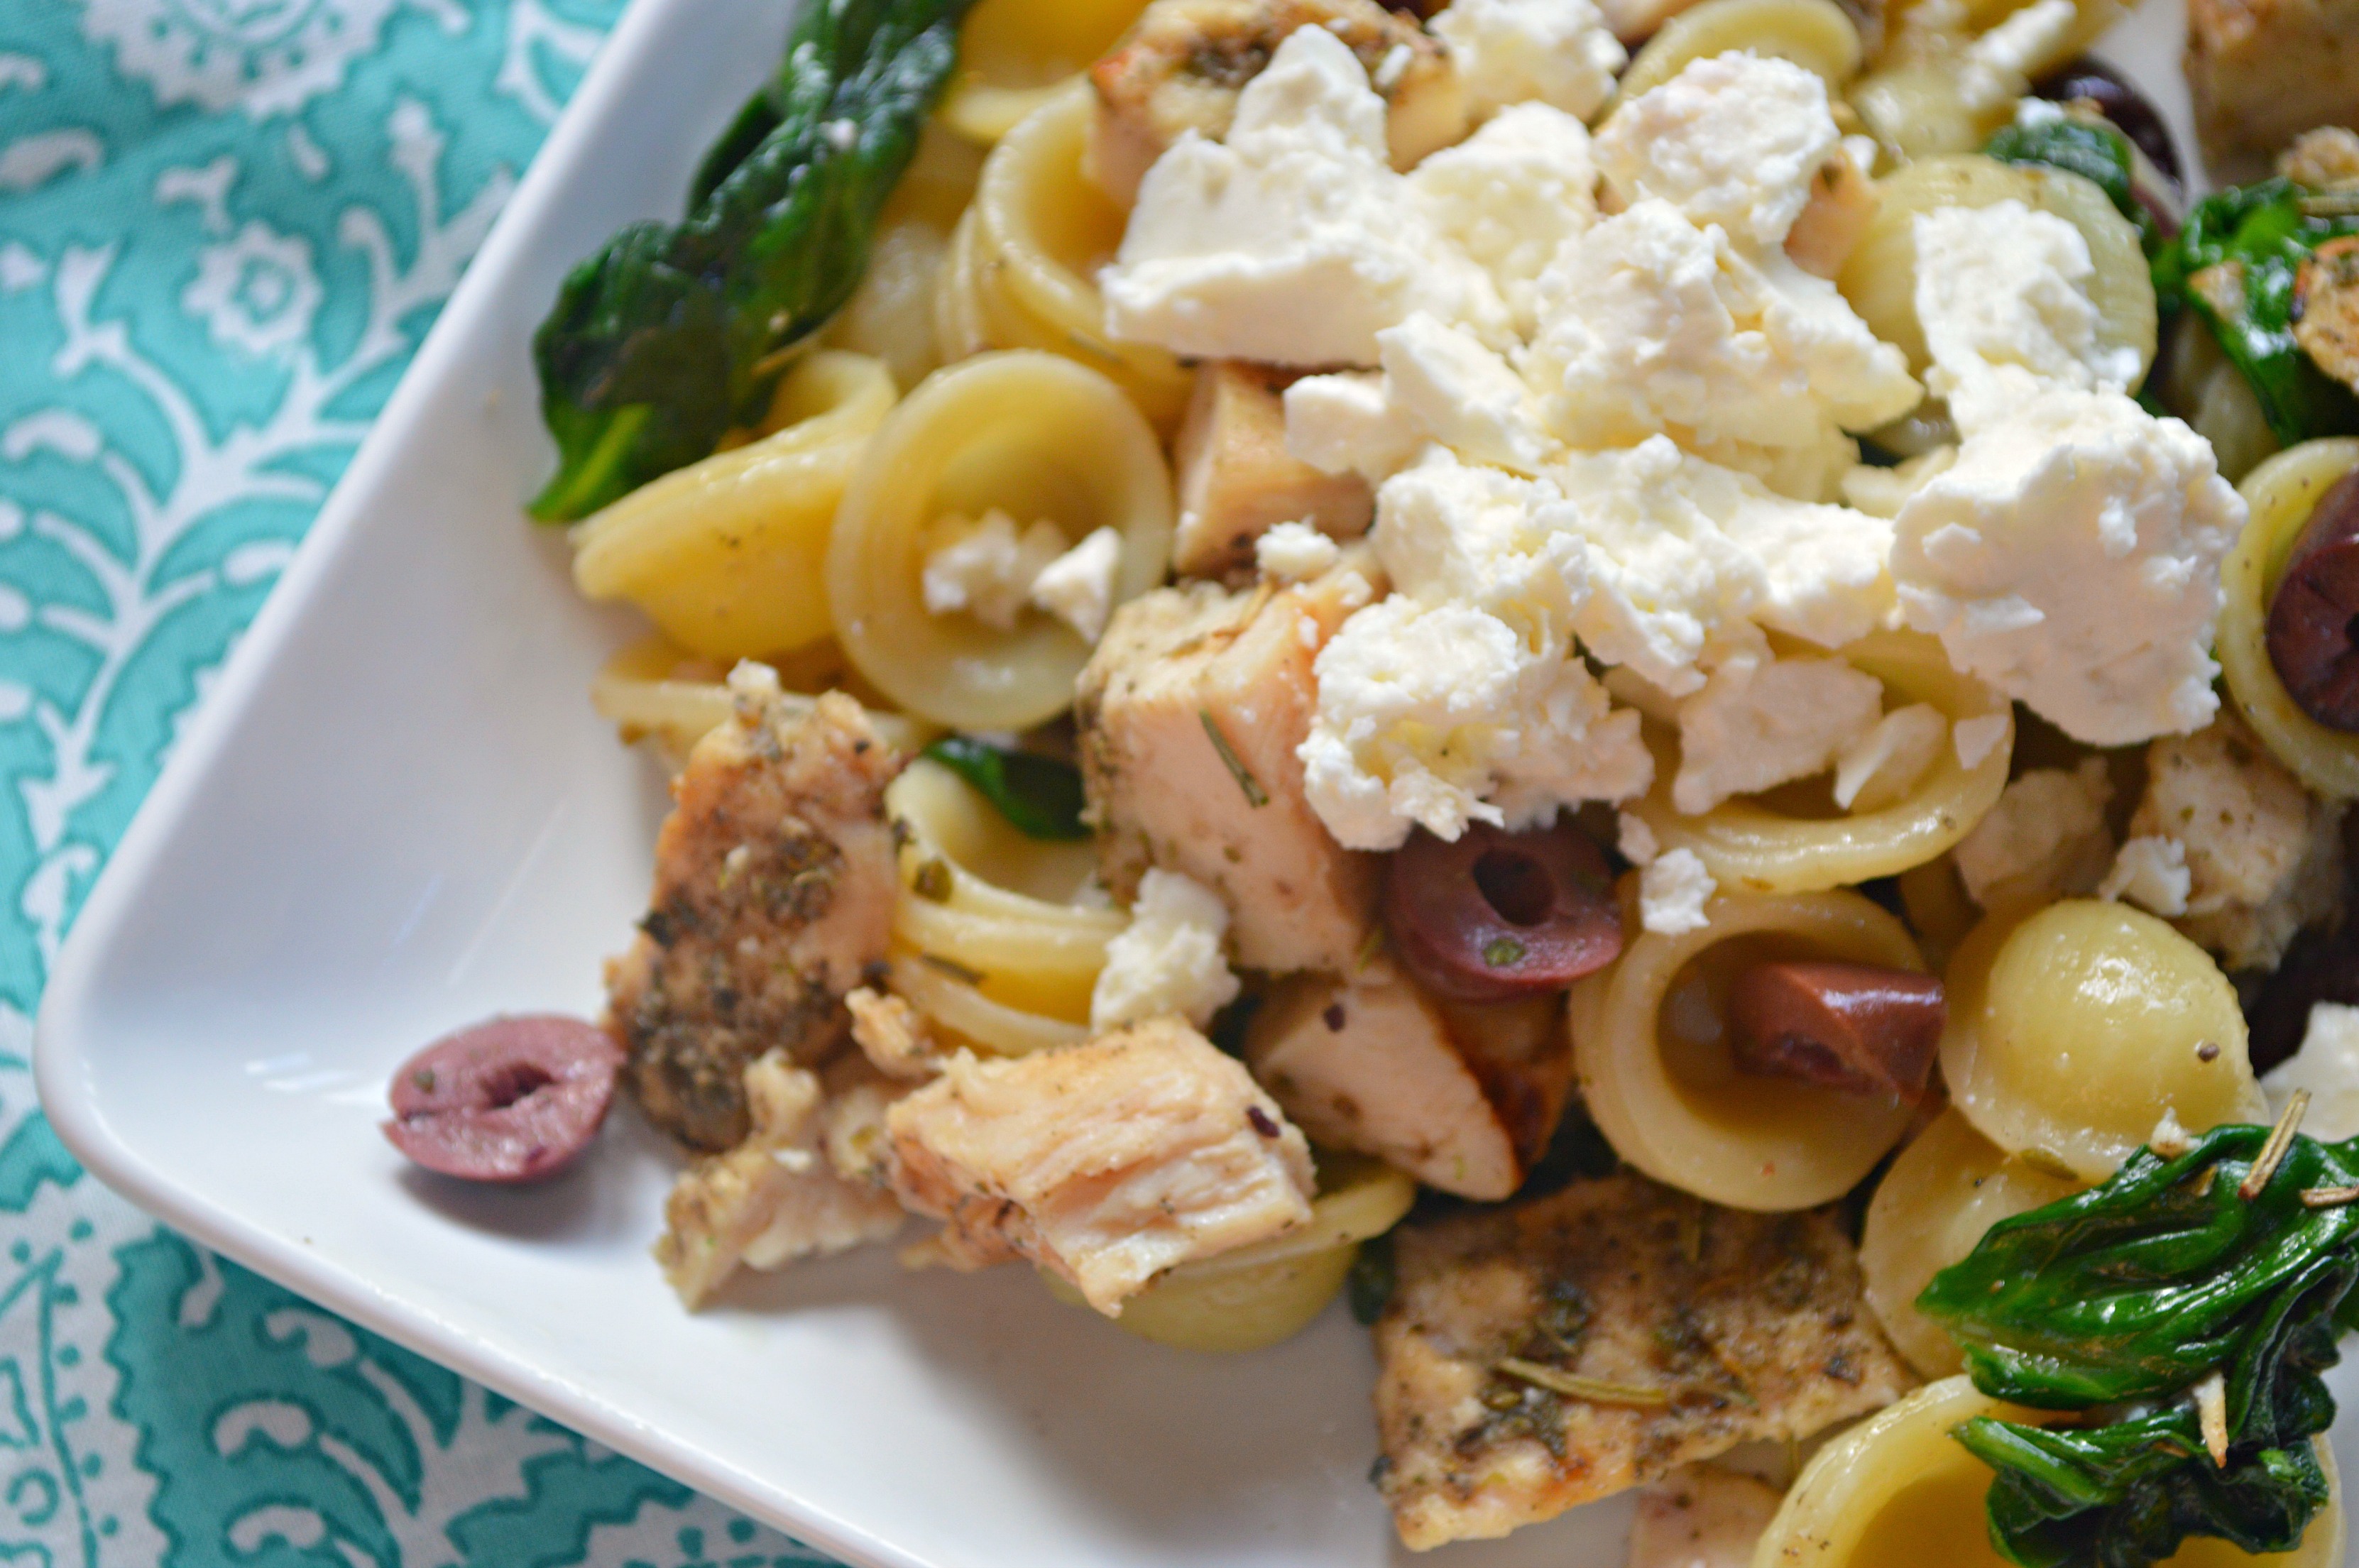
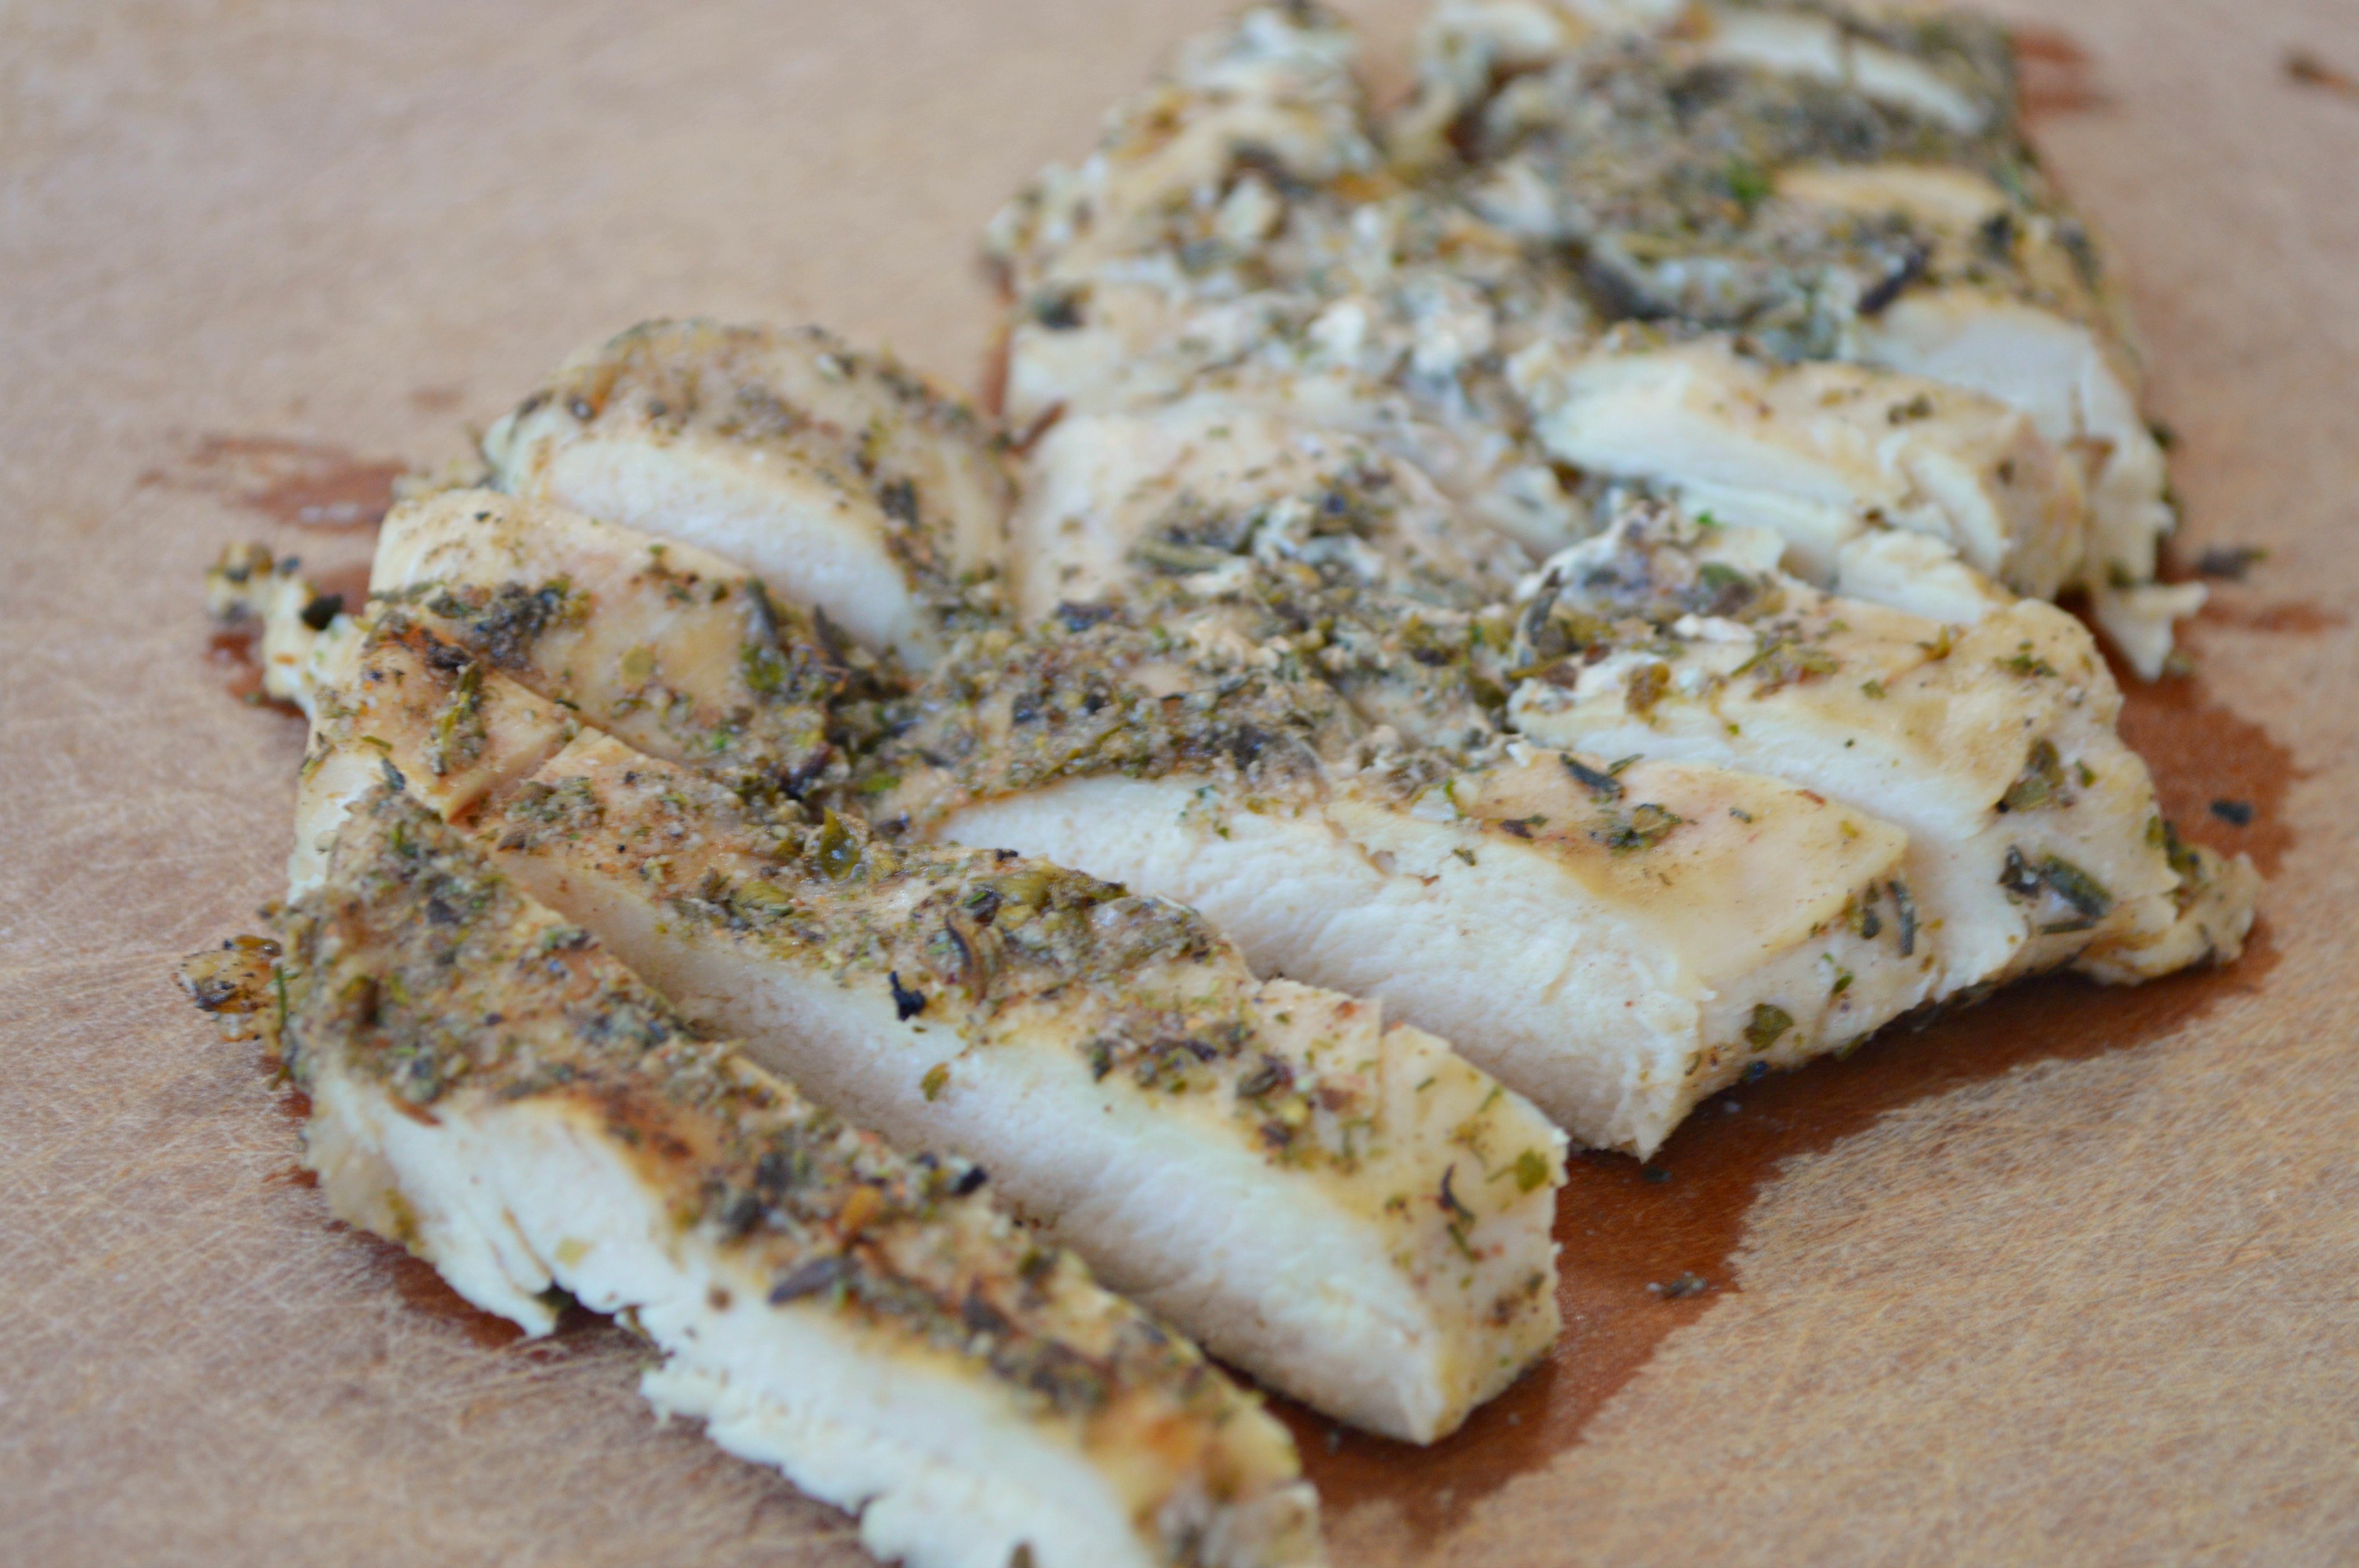
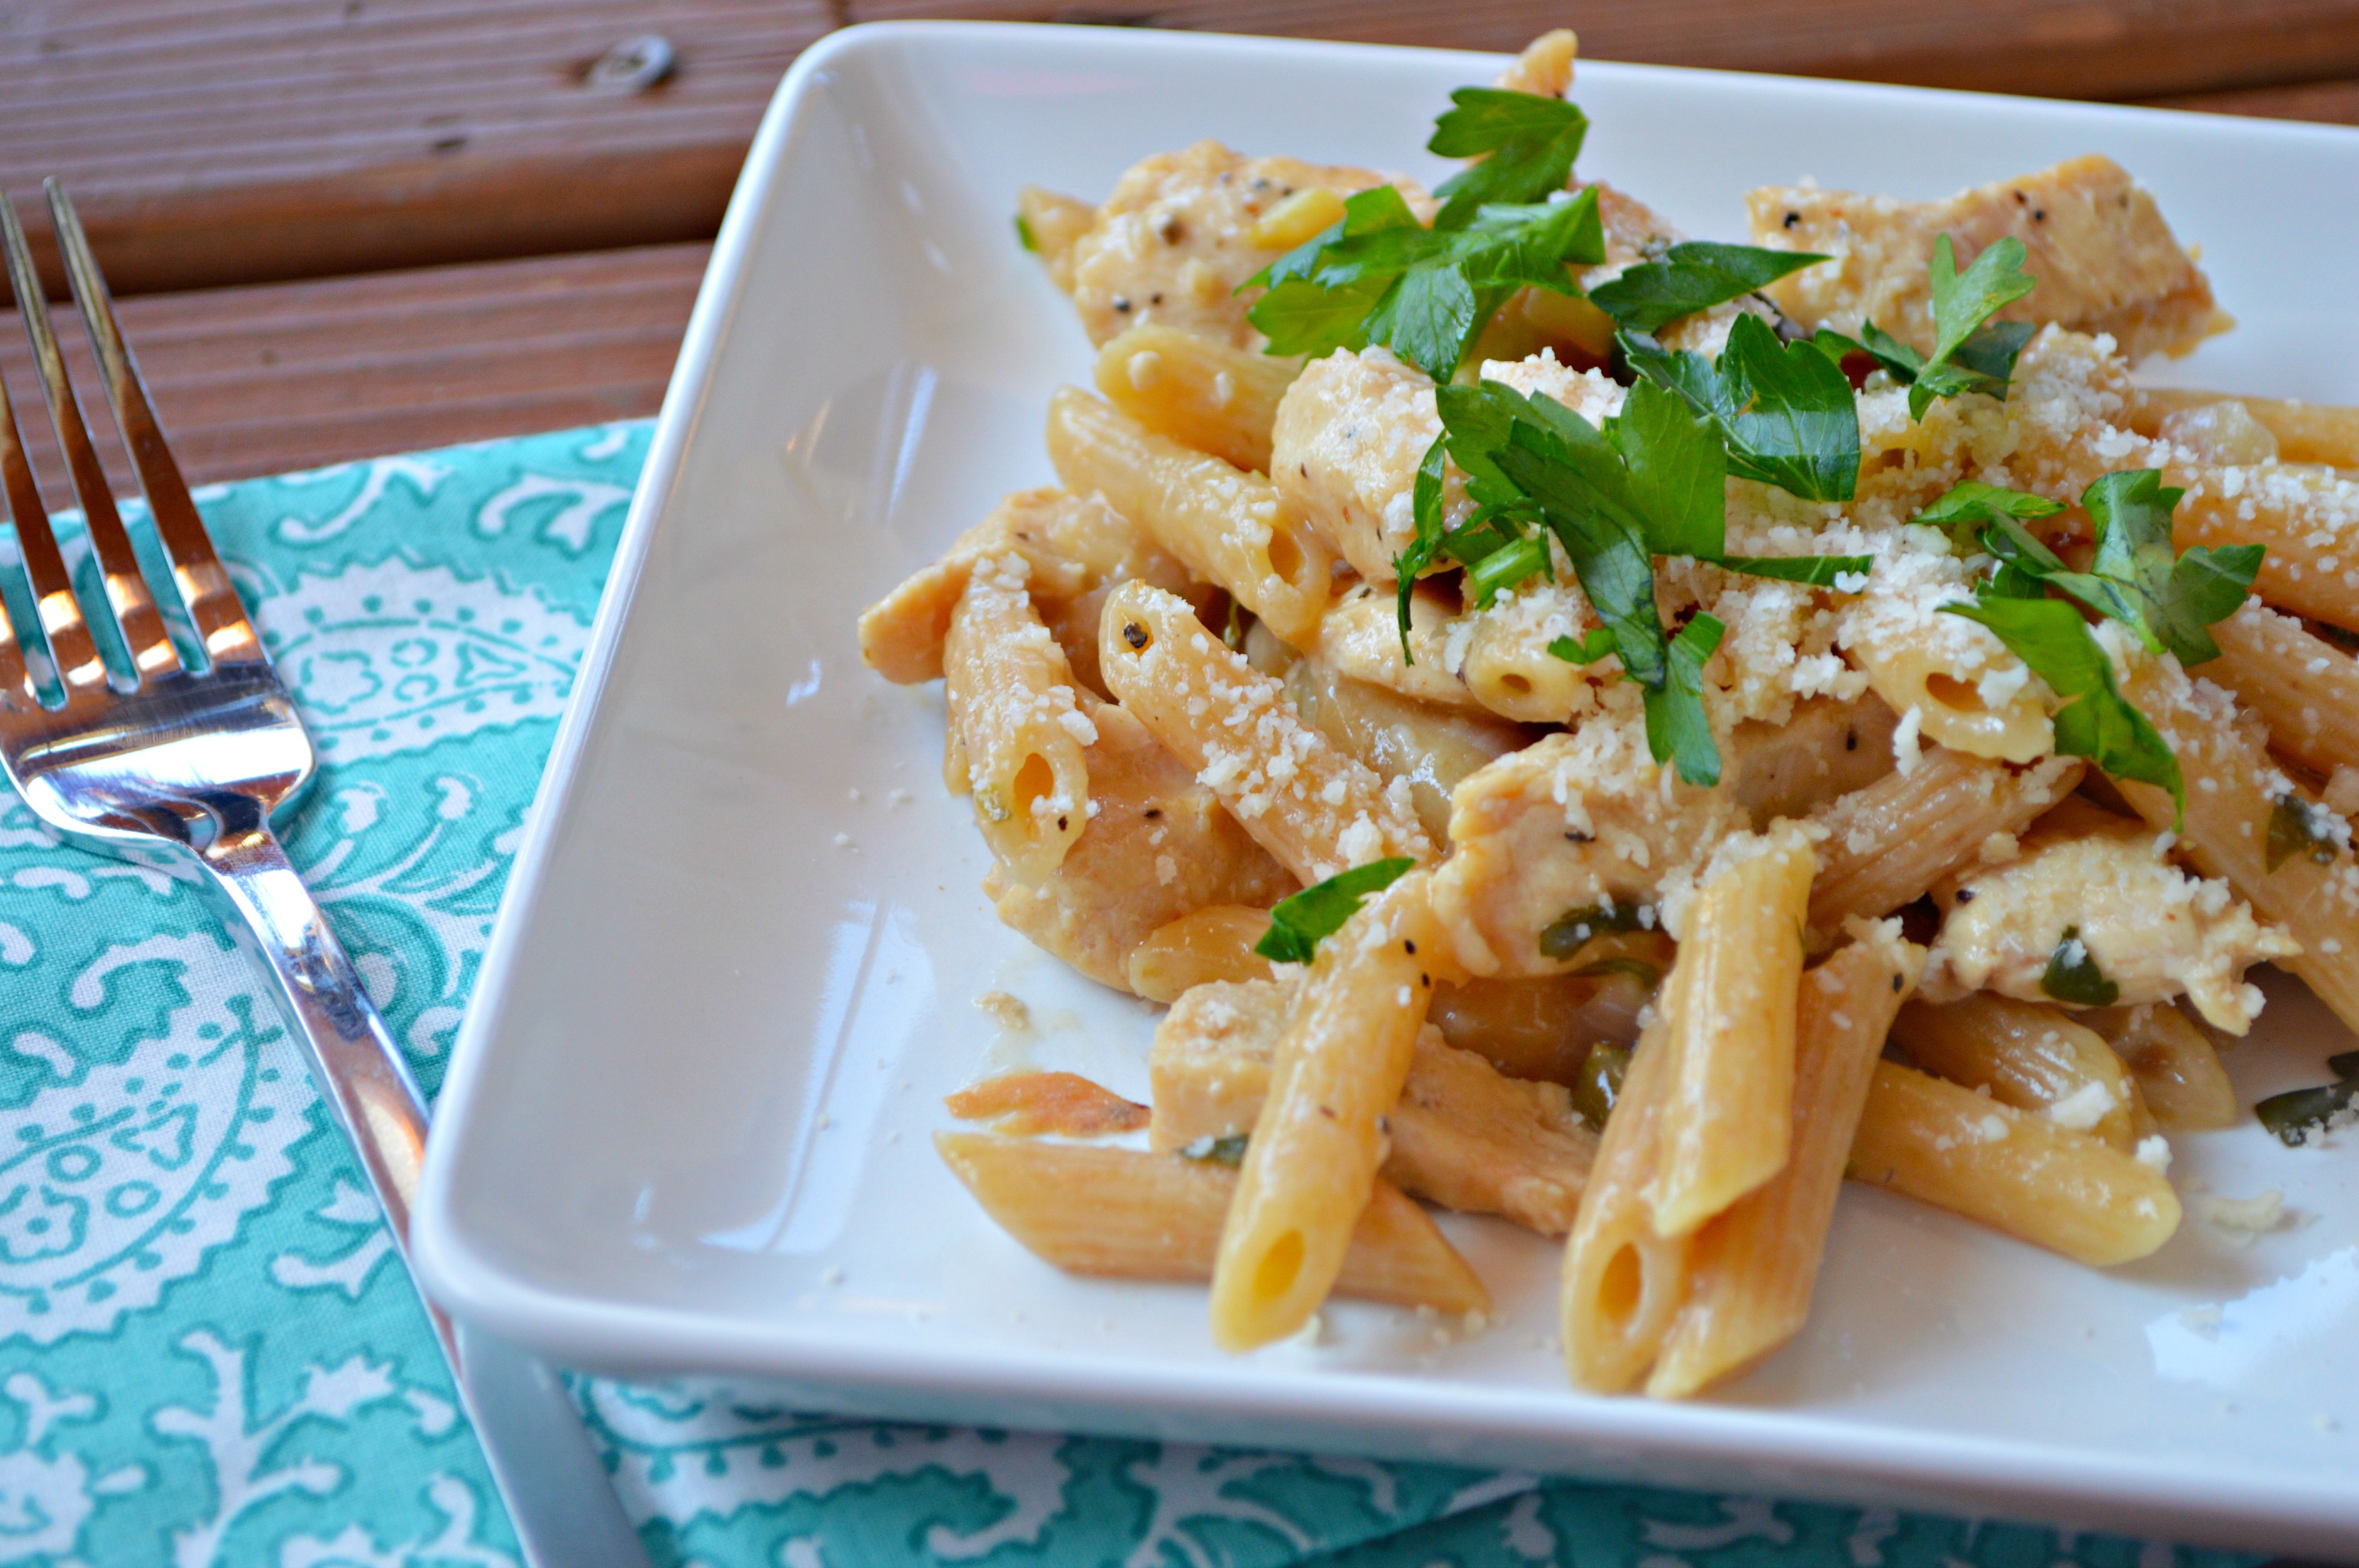
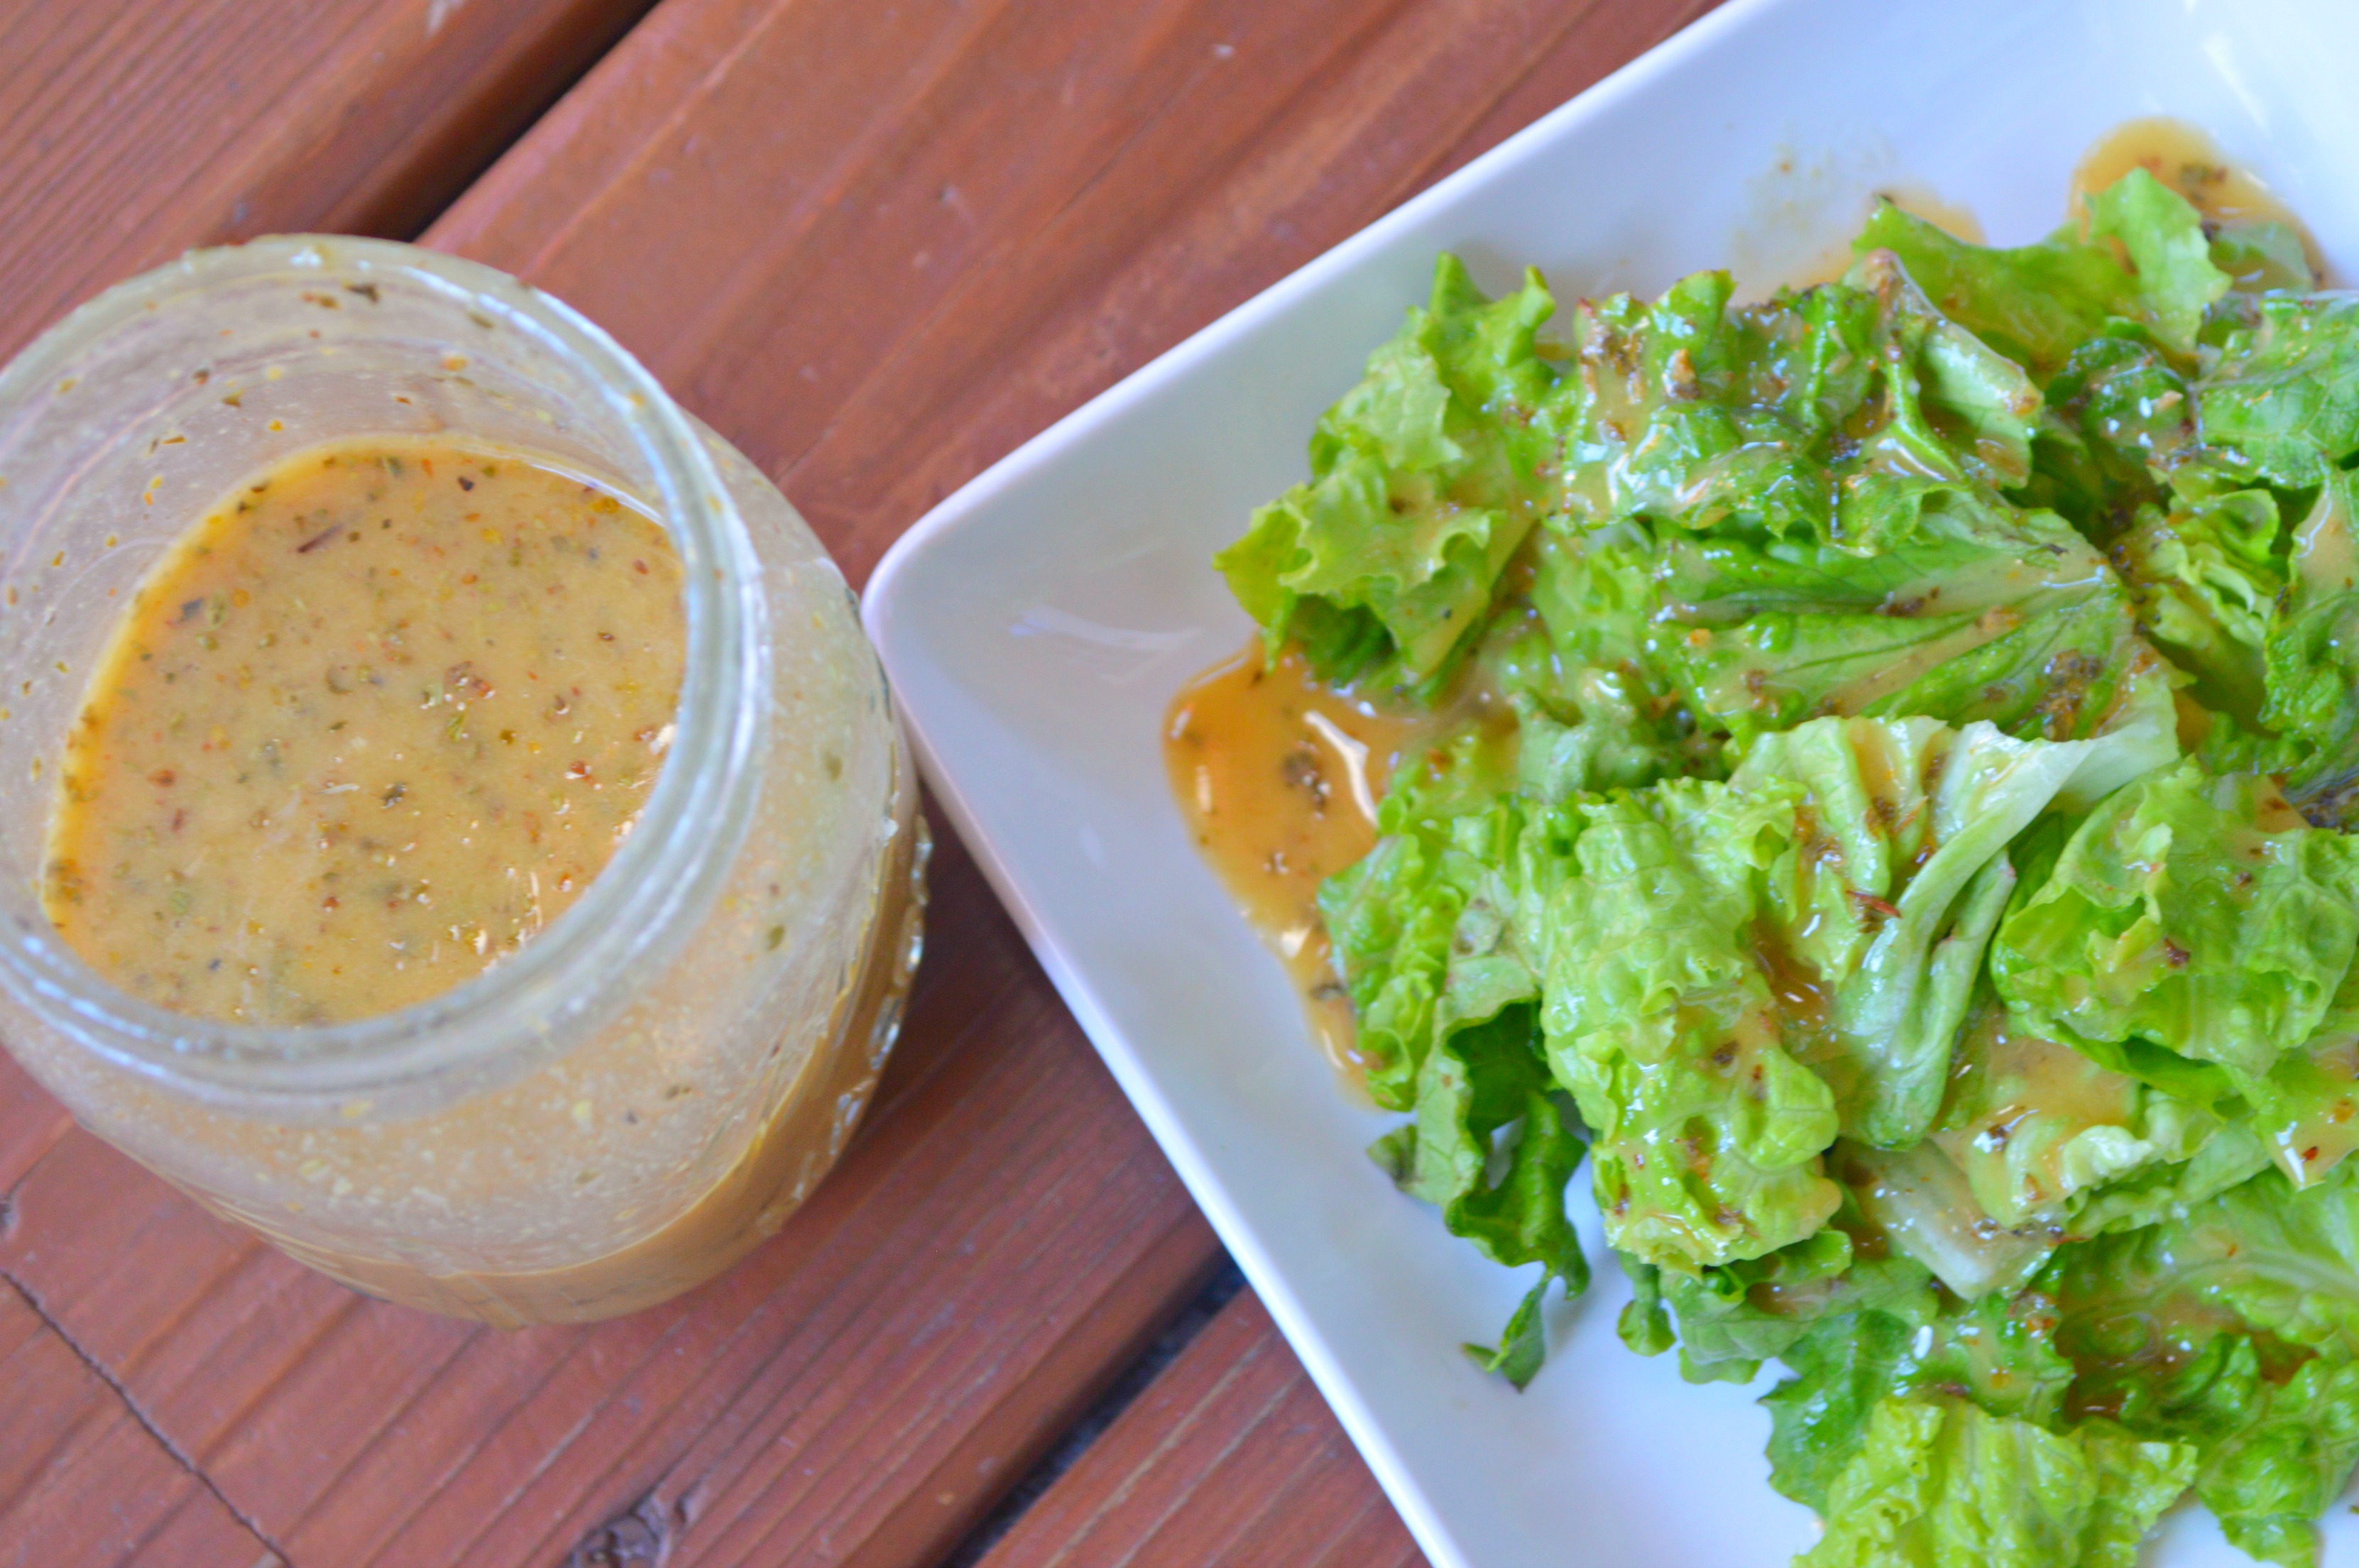
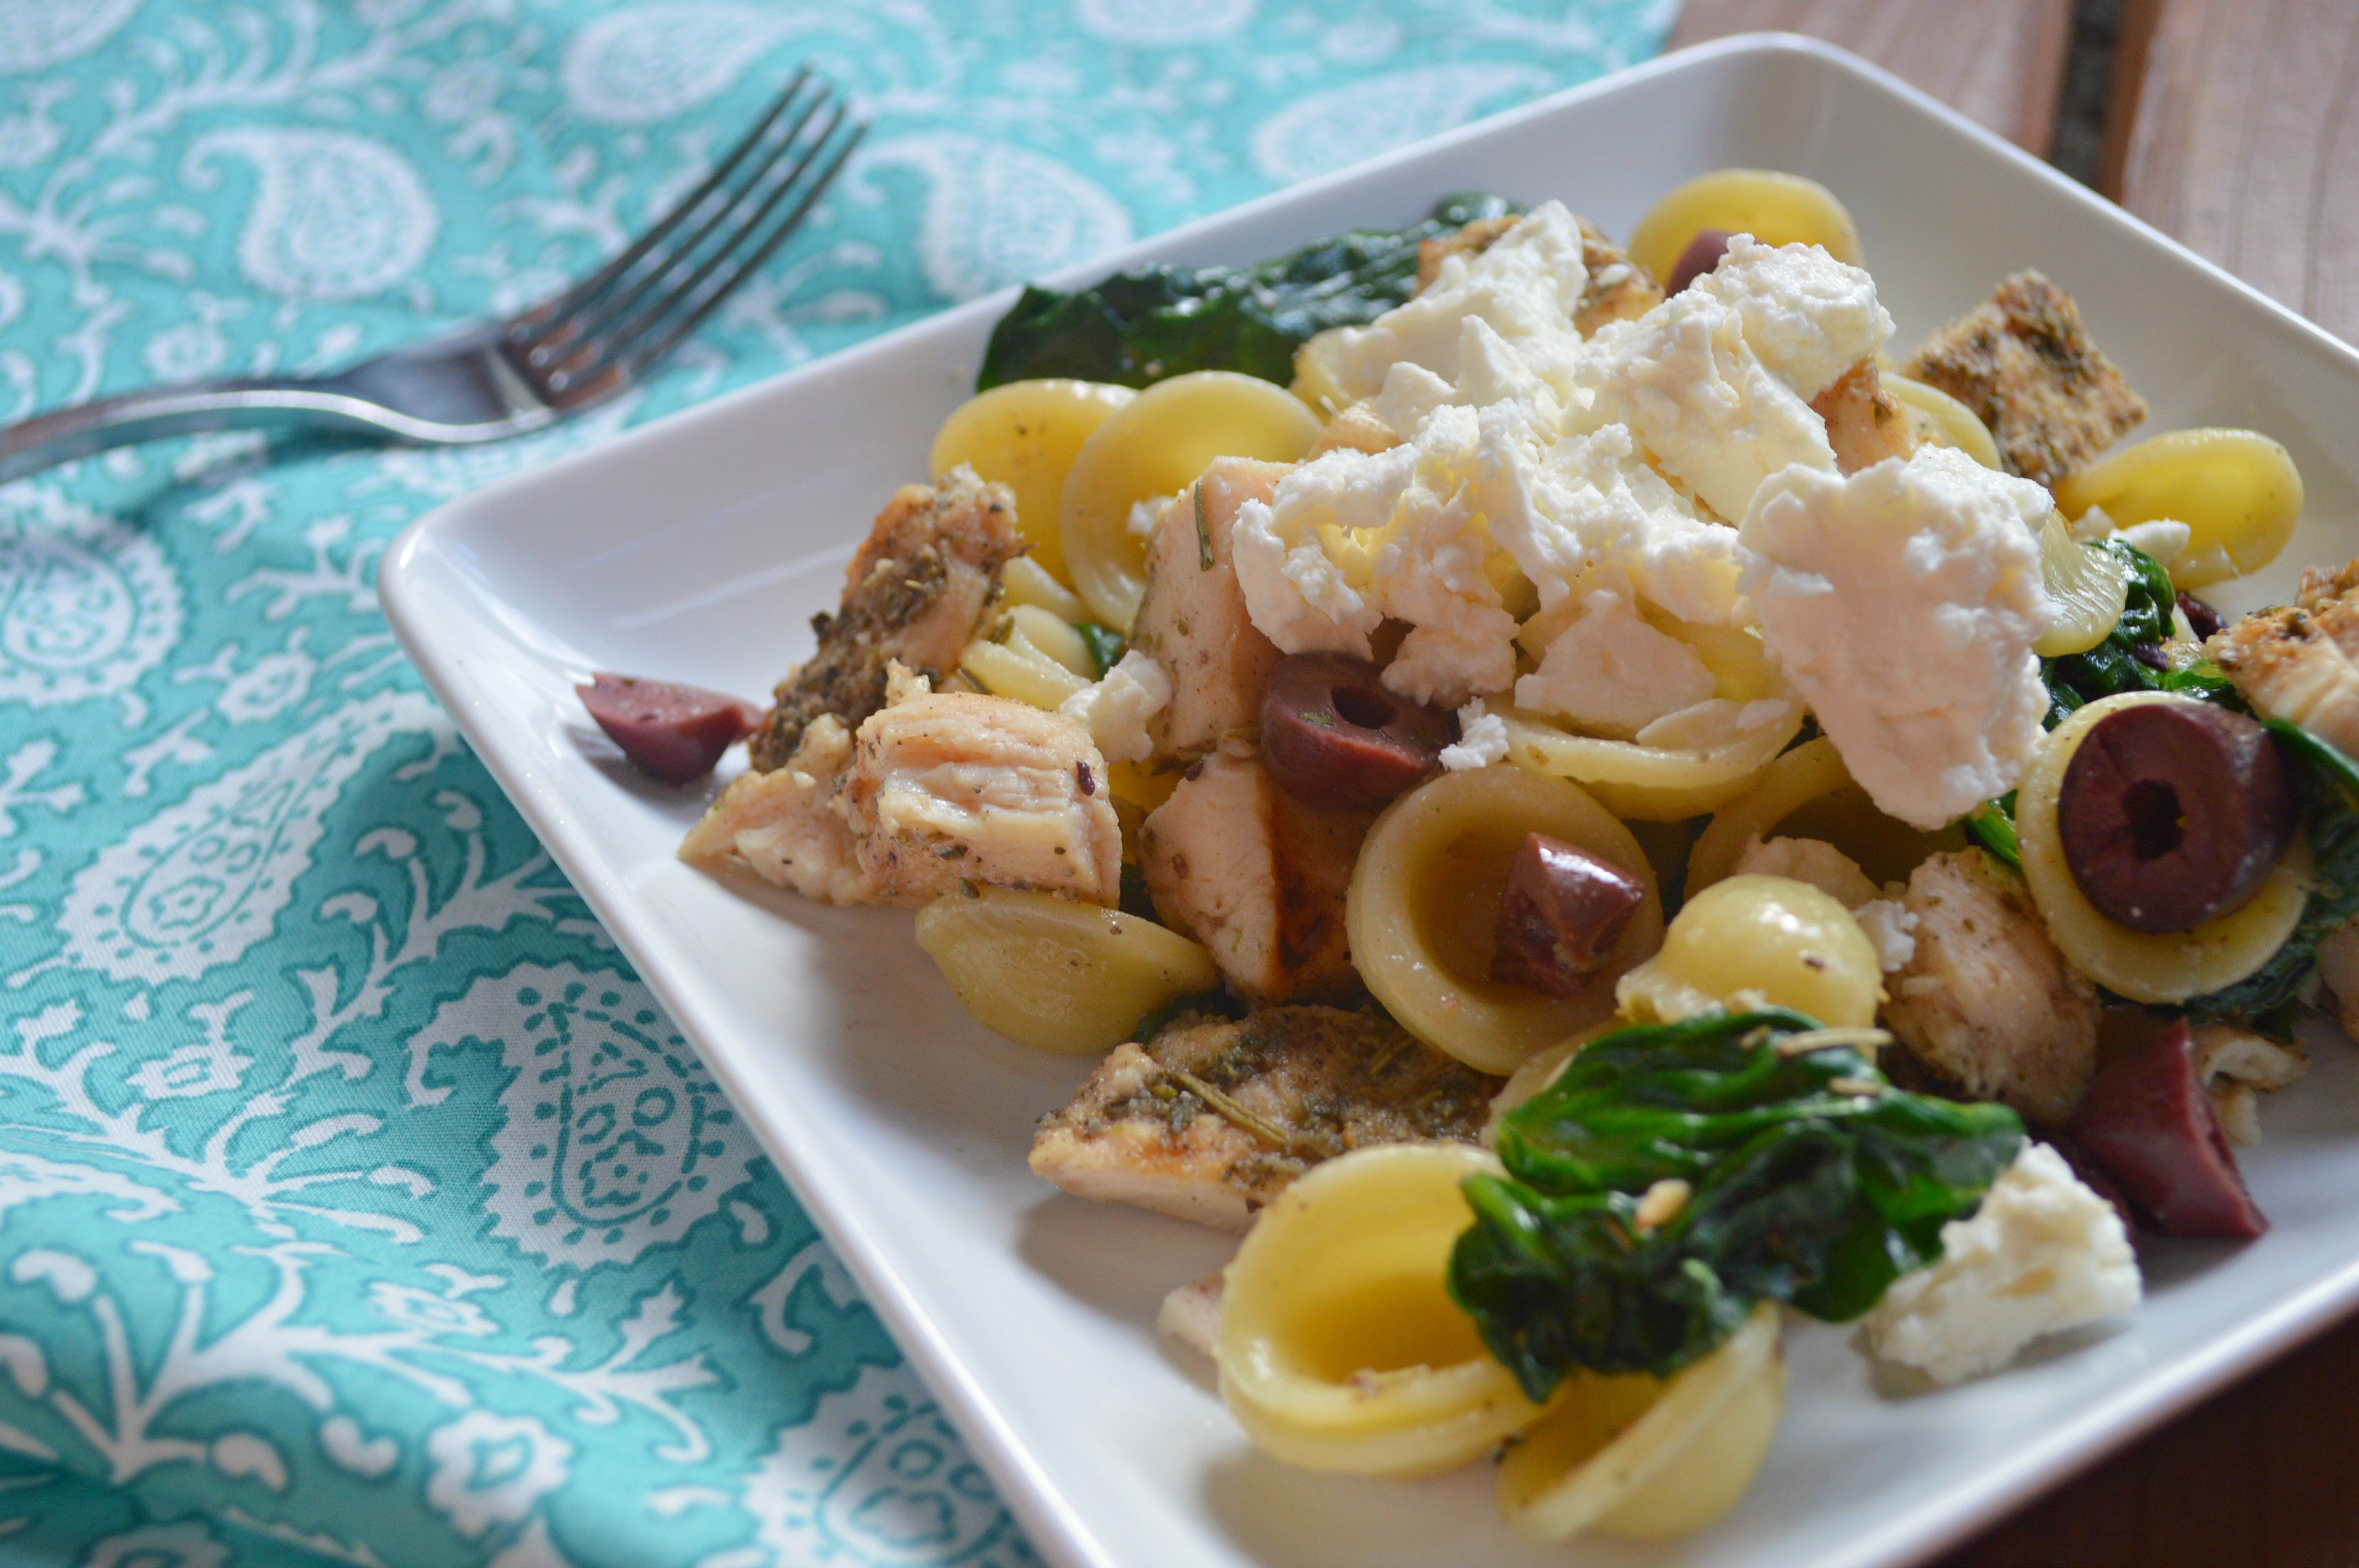
This pasta is a quick weeknight dinner of my dreams!  The  Greek chicken (recipe was posted last week!) was pre-made at the beginning of the week and the pasta came together in about twenty minutes! This pasta is a perfect mix of fresh veggies and tangy cheese and the grilled chicken on top really makes it a top notch dinner.  If you don’t pre make the chicken, get that Greek chicken recipe going while the pasta is cooking, but don’t forget to marinate it starting earlier in the day. If you want to use pre-cooked chicken from the grocery store, that is fine too! Whatever works best for your busy schedule works for this pasta. Also, you can add artichokes and roasted red peppers if you like as well, you can even throw on some pine nuts for a delicious nutty crunch!

The orecchiette pasta was a perfect choice for me, but feel to sub in any pasta you like, as long as it has something to really hold the toppings that characterize this meal. A long strand of spaghetti probably wouldn’t be your best bet, but if you like those best, be a rebel and go for it!

Save Print
Greek Chicken Pasta
 
Ingredients
  • 1 box of orechhiette pasta
  • 2 tbsp olive oil
  • 3 garlic cloves, sliced thin
  • 1 bag of spinach
  • ½ tsp salt
  • ¼ tsp pepper
  • ½ cup kalamata olives, sliced
  • ¾ cup feta cheese, crumbled
  • 1 recipe mediterranean grilled chicken, sliced
Instructions
  1. Cook and drain pasta according to package directions.
  2. While pasta is cooking heat 2 tbsp olive oil in a large saute pan.
  3. Add garlic and saute for one minute.
  4. Add spinach and cook until tender and wilted.
  5. Sprinkle with salt and pepper.
  6. Place pasta in a large serving bowl, add spinach-garlic mixture, and kalamata olives.
  7. Toss to combine
  8. Sprinkle feta cheese on pasta and top with chicken to serve.
3.5.3208


medpasta2


Heather

Leave a Comment

Cakes and Cupcakes Desserts

Buttermilk Pound Cake

buttermilk pound cake

This has very quickly become our absolute favorite cake. It has sort of become my go to cake this summer. When I am asked to bring a dessert, I have been making this cake and it has been met with rave reviews.  It is the perfect dessert to bring to a party, or serve for a casual night at home. The distinct almond flavor makes this cake perfect sliced and served on its own, but topped with sliced strawberries and fresh whipped cream, it is even better!

I know that sometimes the thought of making a homemade cake can be a bit daunting, but I assure you, this is relatively easy to make for a “from scratch” cake. The almond extract is definitely the star of the show, so don’t skip or skimp on that. The best part is the aroma from this cake while its baking! Well…one of the best parts. The real best part is definitely eating it.

Save Print
Buttermilk Pound Cake
Author: Heather
Recipe type: Cake
Cuisine: Dessert
Prep time:  15 mins
Cook time:  70 mins
Total time:  1 hour 25 mins
Serves: 1 cake
 
This cake is light, moist and filled with the most delicious almond flavor.
Ingredients
  • 1 cup butter, softened
  • 2½ cups sugar
  • 4 large eggs
  • 3 cups flour
  • ¼ teaspoon baking soda
  • 1 cup buttermilk
  • 1 teaspoon vanilla extract
  • 2 tsp almond extract
  • Powdered sugar, for dusting
  • Fresh sliced strawberries, optional
  • Fresh whipped cream, optional
Instructions
  1. In a large bowl, cream butter and sugar until light and fluffy.
  2. Add eggs, one at a time, beating well after each.
  3. Slowly add flour and baking soda.
  4. Drizzle in buttermilk slowly and beat on low
  5. Stir in vanilla.
  6. Pour into a greased and floured 10-in. fluted tube pan.
  7. Bake at 325° for 60-70 minutes or until a toothpick inserted near the center comes out clean
  8. Cool in pan for 15 minutes before removing to a wire rack to cool completely.
  9. Dust with confectioners' sugar and serve with strawberries and whipped cream if desired
3.5.3208

buttermilk pound cake2

Heather

Leave a Comment

Chicken & Turkey

Grilled Greek Chicken

mediterraneangrilledchicken

We have spent the summer using our grill as much as possible. I always love the change up during summer that we can dust off the grill, and have an outdoor way to cook our food. I always get a little sad when summer is winding down and the reality of cooking indoors for many, many months begins to set in.

This chicken has been one of our staples all summer long. The brine makes it so tender and juicy and the dry rub is so flavorful that this chicken will complement any recipe, side or salad. I have used this chicken in pasta tosses, salads, or even plain with a side of roasted potatoes and steamed vegetables.

Get this going before you need to put that cover back on the grill for the season. It will become one of the recipes you look forward to making each summer. Okay, I know you can make it inside too, but it really is so much more delicious when you can cook it outside. Enjoy!

Save Print
Grilled Greek Chicken
Author: Heather
Recipe type: Chicken
Cuisine: Dinner
 
This chicken is super flavorful and very tender and juicy. It will very quickly become your favorite!
Ingredients
  • Brine:
  • 4 cups cold water
  • ¼ cup salt
  • ⅓ cup brown sugar
  • 2 lbs boneless, skinless chicken breasts, pounded to 1 inch
  • Dry Rub:
  • 2 teaspoons garlic powder
  • 1 tsp dried thyme
  • 1 tsp dried basil
  • 1 tsp rosemary
  • 2 teaspoons dried Greek oregano
  • 1 teaspoon ground black pepper
  • 1 teaspoon dried parsley
  • 1 teaspoon dried dill weed
  • 1 teaspoon dried marjoram
  • ½ teaspoon ground nutmeg
Instructions
  1. Add all brine ingredients together in a large bowl or ziploc bag, and add chicken.
  2. Refrigerate for 3 hours, or overnight.
  3. Remove from marinade, and set on a plate.
  4. Mix all dry rub ingredients together in a bowl.
  5. Sprinkle both sides of chicken with dry rub and gently press into chicken.
  6. Preheat grill.
  7. Grill on each side for four and a half minutes or until done.
  8. Let rest for one minute, serve.
3.5.3208


Heather

1 Comment

Chicken & Turkey Pasta

Chicken Piccata Pasta Toss

piccatapasta

Friday nights are the hardest night to get any motivation to make dinner. It is totally an “order a pizza” night, but sometimes I try to be very good and cook. Last Friday was one of those nights, and as it got closer to the time to cook, I was regretting my noble intentions. I edged closer to the drawer where I keep the pizza menus, but the chicken I had thawing in the fridge was calling my name. I was starting to get the dinner guilt.

When would I make the chicken? It’s thawing in the fridge and it will go bad if I don’t use it. I have all the ingredients and it would be better for my family if I just made dinner.

But pizza is soooo good.

Well, the guilt got the best of me, and I began to cook. I love chicken piccata and I had a specific idea of how I wanted this pasta to turn out.  I started out reluctantly, but as I was making it, the motivation returned. It is a super easy recipe, and absolutely delicious to eat. The chicken was so tender from simmering in the sauce, and tossing it all with al dente pasta, made it even better.  This is a quick way to get a hearty meal in.

Even when you don’t feel like cooking.

Save Print
Chicken Piccata Pasta Toss
Author: Heather
Recipe type: Dinner
Cuisine: Chicken and Pasta
 
This is so easy and such a delicious twist on a classic chicken piccata. The whole family will want more!
Ingredients
  • 2 tablespoons olive oil
  • 1½ lbs boneless, skinless chicken breasts, pounded thin and sliced
  • Salt and pepper
  • 2 tablespoons butter
  • 4 cloves garlic, finely minced
  • ¼ cup finely diced red onion, chopped
  • ¼ cup all-purpose flour
  • 1 cup white wine
  • 1 lemon, juiced
  • 2 cups chicken broth or stock
  • 3 tablespoons capers, drained
  • 1 pound penne pasta, cooked to al dente
  • ¼ Italian parsley, chopped for serving
Instructions
  1. Heat olive and butter in a large saute pan.
  2. Salt and pepper chicken and add to pan.
  3. Add onions and garlic.
  4. Cook until chicken is browned and onions are golden about 6-8 minutes.
  5. Add flour and toss with chicken mixture.
  6. Add wine and deglaze the pan.
  7. Add lemon and broth.
  8. Heat over low heat for ten minutes.
  9. Stir in capers and toss with pasta and parsley. Top with parmesan cheese.
3.5.3208

piccatapasta2

Heather

Leave a Comment

Breads, Quick Breads and Rolls Breakfast Desserts Snacks

Blueberry Zucchini Bread

blueberryzucchini

It is that time of year again!

I love this time of year because I love to bake, and I have many friends who love to garden. Which I don’t.  Love to garden that is. I tried it one year. It was the most depressing experience ever. Nothing I did seemed to work and the only vegetables that succeeded, were the ones that against all rules of nature, seemed to pop out a few pieces of produce. It was an experience that I don’t have a lot of desire to repeat, unless I have a pro gardener to hold my hand through the entire process.

That is why I am super lucky to know some people that not only garden, but super garden! The zucchini that they bring me are the largest and the greenest around. I love deciding what to make each year! These cupcakes are one of my favorites, but this coconut chocolate version of zucchini bread made me want to bake it again and again. Although, I seriously love any recipes including zucchini, so you are not going to catch me being picky there!

This year, I decided to try a blueberry, breakfast-y version of my favorite zucchini bread. It turned out delicious, extra moist, with ripe juicy blueberries bursting forth in every bite. Well worth grinding up that zucchini for, and a great bread to slice, freeze and pull out for a quick breakfast!

blueberryzucchini2

Save Print
Blueberry Zucchini Bread
Author: Heather
Recipe type: Breads
Cuisine: Breakfast
Prep time:  15 mins
Cook time:  60 mins
Total time:  1 hour 15 mins
Serves: 1 loaf
 
A delicious moist bread with juicy blueberries and a lightly sweet taste!
Ingredients
  • 1 egg
  • ½ cup brown sugar
  • ⅓ cup coconut oil
  • ¼ cup sugar
  • ¼ cup vanilla greek yogurt
  • 2 tsp vanilla extract
  • 1 cup whole wheat pastry flour
  • 1 tsp baking powder
  • 1 tsp baking soda
  • 1 cup coarsely grated zucchini, water squeezed out
  • 1 cup fresh blueberries
  • ¼ cup flour
Instructions
  1. Preheat oven to 350 degrees. Grease and flour well a 9x5 loaf pan and set aside.
  2. In a large bowl, add the first six ingredients (through vanilla) and beat on low with a mixer.
  3. Add 1 cup flour, baking powder and soda, and stir with a spoon to combine
  4. Fold in zucchini until incorporated
  5. In a small bowl, toss blueberries with ¼ cup flour until coated
  6. Gently fold them into the batter including all flour bits in the bowl.
  7. Pour into prepared pan
  8. Add a few blueberries to the top and press in gently
  9. Bake 55-60 minutes or until golden brown and baked through (Test with a toothpick in the middle)
  10. Allow bread to cool for 20 minutes, and then turn out onto wire rack to continue cooling for one hour
  11. Slice and serve.
3.5.3208

Heather

1 Comment

Sauces and Condiments

Ball Can It Forward Day! Recipe + Cool Announcements + A Giveaway!

Ball-CIFD-2016-Logo

The sixth annual Can It Forward Day is coming up soon, and Ball Brand wants you to be with them every step of the way! They will be on their new digital location, Facebook Live, connecting with all of YOU! Can It Forward day is now in its sixth year, and it is a day to celebrate, or pay it forward, the joys and benefits of canning and preserving food at the peak of freshness! The special day will include LIVE demonstrations from popular canning bloggers, as well as the Ball Brand’s expert chefs. This will all take place on the Ball Brand Canning Facebook Page from 10-3:30 pm Eastern Time on July 22nd. Join them there for a unique and fun canning experience, from the comfort of your own home.

cifd-banner-v2

Ball Brand is focusing on charity this year and five, small, not for profit charities have been selected to be benefit from the International Can It Forward Day. For every like, share or comment on the videos during the LIVE hours, $1 will be donated to one of the five charities below:

Southside Middle School Panther Pantry (Muncie, Indiana) – Selected by Jarden Home Brands

The Food Trust (Philadelphia, Pennsylvania) – Selected by Food in Jars

EnrichLA (Los Angeles, California) – Selected by Garden Betty

Second Harvest Food Bank (Nashville, Tennessee) – Selected by The Country Chic Cottage

Food Lifeline (Seattle, Washington) – Selected by Yesterday on Tuesday

What an awesome opportunity! Watch live food demos, learn more about canning, join in a Facebook Live Community AND help out charities all at the same time. In an effort to sweeten the deal even more, every hour, viewers will even have the chance to win a giveaway prize. I can’t really think of a reason NOT to tune in!

Take the pledge now to commit to tuning in by visiting the pledge page and scrolling to the bottom to sign up. By doing so, you will receive a coupon to the online store, freshpreserving.com!

If you are new to canning, or an expert already, you can also ask Jarden Home Brands canning experts questions via Twitter using the hashtag #canitforward on July 22nd, from 10-5pm ET. Feel free to share your own #canitforward creations on their Pinterest and Instagram pages as well!

Have you ever tried canning your own food? I absolutely love my mason jars, but actually canning food is something very new to me. I use my jars for everything….fresh cut flowers, candles, food storage, salad dressings, drinking out of…you name it!

The idea of canning is so intriguing, so when I received “The All New Ball Book of Canning and Preserving”, I couldn’t stop paging through it. It was hard to put down and concentrate on anything else. The cookbook is filled with delicious recipes and mouthwatering pictures to accompany them. At 368 pages, you are getting 200 brand new recipes, and with that, a little bit of everything. Salsas, jams, baked goods, hearty meals, sauces, spreads, condiments are all waiting for you to try. This comprehensive guide also includes step by step instructions, easy to follow charts and very clear directions to help you in canning, whether it is is your first time, or you are a pro.

13613565_995272670520592_5851408451996634071_o

Have I peaked your interest on the cookbook? Well if so, today is your lucky day because one of you will be paging through it in no time! If you enter my giveaway below, you have the chance to win this cookbook, AND a $5 off coupon as well! Enter below now, and you MIGHT BE our LUCKY winner!

The book was filled with such an array of tantalizing recipes, I had a hard time choosing which one to try. I mean, if you had to pick between a creamy Caramel Sauce or tart lemon curd, how would you choose between those two? It is not an easy decision, let me tell you!

I decided on the Salsa Verde. The other two choices were presenting a much too difficult decision for me to make! Turns out, I made the best choice, because it was delicious. The recipe was pretty easy to make and made three jars of this delicious salsa. It is great with chips for a quick snack or appetizer, but would be even better in some of my favorite recipes such as my favorite shrimp enchiladas, or my honey lime enchiladas. The fire roasted flavor of the tomatillos, along with a little heat from the jalapeño and citrusy kick from the lime, created the perfect mixture of spicy and flavorful. The recipe follows below, but this is only one of several delicious recipes that you will find in this cookbook. Don’t forget to enter the giveaway below for your chance to win!

balljar1

Save Print
Roasted Salsa Verde
Author: The All New Ball Book Of Canning and Preserving
Recipe type: Salsa
Cuisine: Sauces, Salsa, Condiments
Serves: 3 jars
 
This delicious roasted salsa has the perfect blend of spice and it is perfect on its own, or in one of your favorite recipes that needs a kick!
Ingredients
  • 4 lbs. tomatillos, husks removed
  • 2 medium sized white onions, each cut into 8 wedges
  • 2 jalapeno or serrano peppers (I used jalapeños)
  • 6 garlic cloves, peeled
  • ½ cup lime juice (about 6 limes)
  • 1 cup coarsely chopped cilantro leaves
  • 2 tsp salt
  • 1 tsp pepper
Instructions
  1. Preheat oven to 425 degrees. Arrange tomatillos, stem side down, on a large rimmed baking sheet lined with aluminum foil. Place onions, jalapeño peppers, and garlic on prepared baking sheet. Bake at 425 degrees for 15 minutes or until garlic is softened. Remove garlic from baking sheet. Bake onion mixture 15 more minutes or until onion is tender and tomatillos and peppers are slightly charred. Remove from oven and cool slightly. when peppers are cool enough to handle, remove stems and seeds. Process roasted vegetables and garlic, in batches, in a food processor until smooth. Transfer to a 4-qt. stainless steel or enameled saucepan. Stir in lime juice, and remaining ingredients. Bring to a simmer. Remove from heat. Ladle hot salsa into a hot jar, leaving ½ inch headspace. Remove air bubbles. Wipe jar rim. Center lid on jar. Apply band and adults to fingertip tight. Place jar in boiling water canner. Repeat until all jars are filled. Process jars about 20 minutes, adjusting for altitude. Turn off heat, remove lid, and let jars stand for 5 minutes. Remove jars and cool.
3.5.3208

  Interested in entering our giveaway? Learn more here! 


This post is courtesy of Jarden Home Brands

Heather

1 Comment

Christmas Cookies & Bars Desserts

Raspberry Muesli Cookie Bars

raspberr3

These cookies are so good. Bursting with the fresh flavor of raspberry jam, these are easy to make and even easier to eat by the panful. Truly, with whole wheat flour, jam (which is fruit, really) and oats melded together in this delicious little cookie, this can be breakfast.  I will not judge you. Eat it for breakfast, eat it for a snack, you can even eat if for dinner! This is sweet, but not too sweet with a hearty crunch in each bite.

I probably have a million raspberry cookie recipes that I can share with you along the way. I love raspberry bars in any form or fashion, but I have to say…these are probably my favorite! Bake up a batch and enjoy!

Raspberry Muesli

Save Print
Raspberry Muesli Cookie Bars
Author: Heather
Recipe type: Bars
Cuisine: Cookies and Bars
Cook time:  40 mins
Total time:  40 mins
 
A deliciously hearty treat bursting with raspberry flavor
Ingredients
  • 1½ cup whole wheat pastry flour
  • 1 tsp baking powder
  • ½ tsp salt
  • 1 cup packed brown sugar
  • 2 cups Muesli cereal
  • ½ cup oats
  • 1 cup butter, melted
  • 1 cup jam
Instructions
  1. Preheat oven to 350°F
  2. Line a 8x8 baking pan with parchment paper
  3. Combine flour, baking powder and salt in a bowl
  4. Add brown sugar, muesli, and oats.
  5. Mix thoroughly.
  6. Drizzle in butter, making sure that no ingredients are left dry
  7. Press ½ of the muesli mixture into the bottom of the prepared pan
  8. Make sure it is spread to the ends of the pan
  9. Bake for 10 minutes
  10. Remove from oven and let cool for 5 minutes
  11. Spread evenly with jam
  12. Crumble the remaining muesli mixture over the top
  13. Bake for 30 minutes or until golden brown
  14. Let cool completely for one hour
  15. Cut into bars and serve
3.5.3208

raspberry2

Heather

Leave a Comment

Side Dishes Vegetables and Fruit Vegetarian

Zucchini Tots

Zucchini Tots

So just last week I started exercising at a new gym that opened up in town. It is super convenient, which is good for me because any obstacle that gets in the way of working out (like it being ten minutes out of my way) always seems to be the perfect excuse to immediately stop working out.

Who feels me on that one?

So, I started these classes there, that are like a sort of circuit training type of thing and the people who teach it are really awesome, but each time I am there, I am reminded how much older I am than the last time I belonged to a gym. I feel surrounded by people who seem to be way younger than me, which sort of makes me feel like an old lady trying to keep up with the exercises. No one seems to have children and I am met with a lot of blank stares when I mention anything that has to do with my kids. Not that I talk that much while exercising. I am one of those people that likes to be anything BUT social while working out. These people seem to enjoy talking though, so I try to make nice. Today, in the middle of the thousandth lunge that I was instructed to do, the trainer yelled, “Come on ladies! Let’s get those Victoria Secret bods ready for the summer!”

I seriously almost died laughing.

Where am I going with this you might ask? Well, although I have no plans to get a Victoria Secret bod (or anything even close to that), I am excited to welcome the summer with lots of fresh air and exercise and eating lots of in season veggies and fruits. Although I absolutely love fruits and vegetables, sometimes eating them plain gets seriously boring. I love them grilled, roasted and steamed, but sometimes it’s fun to add them to recipes that normally don’t even include veggies. The more the merrier, right?

These zucchini tots are the perfect replacement for a starchy side dish and are seriously so good! My kids didn’t even ask about the ingredients as they were shoveling them down their throats and asking for more. The spicy ketchup? A perfect accompaniment, but regular ketchup will do just fine too.

These are easy to make and go great with anything, but the one thing that I will stress is to make sure you squeeze all of the water out of the zucchini or you will have mushy tots!

These are super kid friendly and will sure to be a hit with your family, and you will love them too!

Save Print
Zucchini Tots
Author: Heather
Recipe type: Side Dish
Cuisine: Side Dish Veggies
Prep time:  10 mins
Cook time:  20 mins
Total time:  30 mins
Serves: 40
 
These are irresistible and a perfect accompaniment to grilled chicken or steak. Delicious and filled with veggies, these are a healthy replacement for tater tots!
Ingredients
  • 2 tsp olive oil
  • 2 cups packed shredded zucchini (see NOTE below)
  • 2 eggs, beaten
  • ¼ cup onion, finely minced
  • ¼ cup grated fresh parmesan cheese
  • ½ cup freshly grated cheddar cheese
  • ⅔ cup seasoned bread crumbs
  • ¼ tsp salt
  • ¼ tsp pepper
  • SPICY KETCHUP:
  • ½ cup ketchup
  • ¼ tsp garlic powder
  • 1-2 tsp sriracha sauce (or more if you like it spicy!)
Instructions
  1. NOTE: Once you shred the zucchini, make sure to drain all the water out. Squeeze handfuls between thick paper towels to make sure to get all of the water out. If the zucchini is still wet, they won't cook up well.
  2. Preheat oven to 400 degrees.
  3. Line a large baking sheet with parchment paper or foil
  4. With a basting brush, spread a thin layer of olive oil on the parchment
  5. Mix zucchini with eggs and onion
  6. Add cheese and stir gently
  7. Add breadcrumbs, salt and pepper.
  8. Mix until completely combined
  9. With clean hands, form into small "tots"
  10. Set on baking sheet spaced evenly apart
  11. Bake for 18-20 minutes, turning halfway through until cooked through and golden
  12. Mix spicy ketchup ingredients together and serve with zucchini tots
3.5.3208

zucchini2


Heather

Leave a Comment

Chicken & Turkey

Chicken Florentine with Garlic Smashed Potatoes

chicken florentine

My kids are really not picky eaters at all, but have a select list of about four items that they absolutely refuse to eat. Unfortunately for me, they chose some of my favorite foods to put on that list. Mushrooms, artichokes, shrimp and spinach.  These are the items on their DO NOT EAT list and those are the items on my “I can eat these every day” list.

Mom problems.

Somehow, I managed to sneak this spinach in to this dish without too much complaining. They picked at the spinach, which I could have predicted. Lucky for me though, they fully enjoyed the tender chicken drizzled in this deliciously creamy sauce and served over garlic smashed potatoes. I enjoyed it too…covered in tons of spinach!

This is a little more involved dish, so save it for a weekend meal or for a night when you have a little extra time to work on dinner.

It will be worth it, I promise you.

Save Print
Chicken Florentine with Garlic Smashed Potatoes
Author: Heather
Recipe type: Chicken
Cuisine: Dinner
 
This is a delicious chicken dish that is modest enough for a weeknight meal, but fancy enough to serve to friends and impress them.
Ingredients
  • 6 boneless, skinless chicken breasts
  • 1 tsp salt
  • ½ tsp pepper
  • ½ cup flour
  • 4 tbsp butter
  • 1 tbsp olive oil
  • ½ cup sweet onion, finely minced
  • 4 cloves of garlic, finely minced
  • 2 cups white wine
  • 1½ cups whipping cream
  • 2 cups frozen chopped spinach, thawed and squeezed dry
  • 6 yellow potatoes, peeled, quartered
  • 4 cloves of garlic, whole and peeled
  • 2 tbsp butter
  • ¼ cup whole milk
  • 1 tbsp sour cream
  • salt and pepper to taste
Instructions
  1. Place quartered potatoes and garlic cloves in a large saucepan and cover with cold water.
  2. Heat on high until boiling and cook for 20-25 minutes, or until tender.
  3. While potatoes are boiling, sprinkle the chicken with salt and pepper
  4. Dredge the chicken in the flour to coat lightly.
  5. Melt 2 tbsp of butter and 1 tbsp olive oil in a large pan
  6. Shake flour off of chicken and cook chicken about 5 minutes per side or until lightly browned
  7. Transfer chicken to a plate and keep warm
  8. Melt 2 tablespoons of butter and 1 tbsp olive oil in the same skillet over medium heat
  9. Add the onions and garlic and saute until the onions are translucent, about one minute
  10. Add the wine and boil until the liquid is reduced by half, about 3 minutes
  11. Add the cream and boil until the sauce reduces by half, stirring often, about 3 minutes
  12. Season the sauce, to taste, with salt and pepper
  13. Add the chicken to the sauce, and coat well
  14. Add thawed spinach to the sauce and cook until heated through
  15. Keep warm
  16. When potatoes are done, drain and transfer to a large bowl
  17. Add butter, milk, sour cream and salt and pepper
  18. Using a potato masher, mash potatoes , garlic, milk and butter together and stir
  19. Serve chicken and sauce over the potatoes
3.5.3208


florentine2


Heather

Leave a Comment

Salads and Dressings

Lemon Vinaigrette

lemon vin2

I am always looking to pump up my boring salad routine. Not that my salads are boring, they are just boring to me. As in, I need some new ones to work into my menu plans.

This lemon vinaigrette is exactly what I was looking for. It reminds me of a dressing that I love from a restaurant in Chicago. This salad is the epitome of a salad. Crisp greens, crunchy cucumbers, sweet onions, briny olives, crunchy, perfectly seasoned croutons and the best creamy italian vinaigrette you have ever tasted.

I have always tried to recreate the recipe, but with very little luck. Finally, I think I have come close. As close as I am probably ever going to get, so I will take it!

This is perfect drizzled into a salad filled with goodies, or over simple, crisp greens. It would also be amazing drizzled over grilled vegetables too.

Save Print
Lemon Vinaigrette
Author: Heather
Recipe type: Dressing
Cuisine: Salads
Prep time:  40 mins
Total time:  40 mins
 
Ingredients
  • ¼ cup red wine vinegar
  • 2 tbsp dijon mustard
  • 1½ tsp oregano
  • 1 clove garlic, finely minced
  • 1 tsp salt
  • ¼ tsp pepper
  • 3 tbsp fresh lemon juice
  • ¼ cup honey
  • ¾ cup extra virgin olive oil
Instructions
  1. Add all ingredients to glass jar or dressing cruet.
  2. Shake vigorously.
  3. Taste, and adjust seasonings as necessary.
  4. Refrigerate for 30 minutes and take out to come to room temperature again.
  5. You may skip this step if you are in a rush, but it really helps meld the flavors together.
  6. Serve over mixed greens, roasted vegetables or as a dip for raw veggies.
3.5.3208

lemon vin

Heather

Leave a Comment

  • « Previous Page
  • 1
  • …
  • 4
  • 5
  • 6
  • 7
  • 8
  • …
  • 38
  • Next Page »

Heather

I am a midwestern girl who grew up in the big city, but now enjoys her days as a stay at home mom in the suburbs. Who says spending time in the kitchen has to be boring? I hope to inspire your family kitchen with some new ideas, fun recipes and great tips.

Stay Up to Date

Get all the latest tasty goodness straight to your inbox!

Girl and her Kitchen

Join us!

Hey! I am the GIRL in the kitchen and I am so glad you decided to visit. Love to cook and eat? You will find some great recipes on this site, whether you are looking to eat healthy, splurge on a dessert, make dinner or host a party-I have it all! Sometimes I’ll give you a story along with my recipe, other times, I want to take you straight to the food!  Whatever the reason that you decided to visit, I am so glad you joined me in the kitchen! Feel free to take a look around the site, and please…stay awhile!

Archives

Popular Categories

  • Appetizers
  • Breakfast
  • Crafts
  • Salads and Dressings
  • Side Dishes
  • Vegetables and Fruit

Most Popular Posts

Corner Bakery Cafe Giveaway!

Corner Bakery Cafe Giveaway!

Filed Under: Reviews

Bacon Cheddar Skillet Cornbread

Bacon Cheddar Skillet Cornbread

Filed Under: Breads, Quick Breads and Rolls, Side Dishes

Puffy Pancakes {Perfect for Valentine’s Day!}

Puffy Pancakes {Perfect for Valentine’s Day!}

Filed Under: Breakfast, Valentine's Day

100 Days of Real Food Cookbook Review {and Giveaway!}

100 Days of Real Food Cookbook Review {and Giveaway!}

Filed Under: Vegetarian

Copyright © 2025 · Divine theme by Restored 316