• Email
    • Facebook
    • Instagram
    • Pinterest
    • Twitter

Girl and Her Kitchen

Plan. Make. Eat. Design. Craft. Create. Celebrate. Life.

  • Home
  • About the Girl
  • Recipe Index
  • We LOVE
  • Weekly Menu

Breads, Quick Breads and Rolls Desserts

Double Chocolate Banana Bread

100_8801.jpg

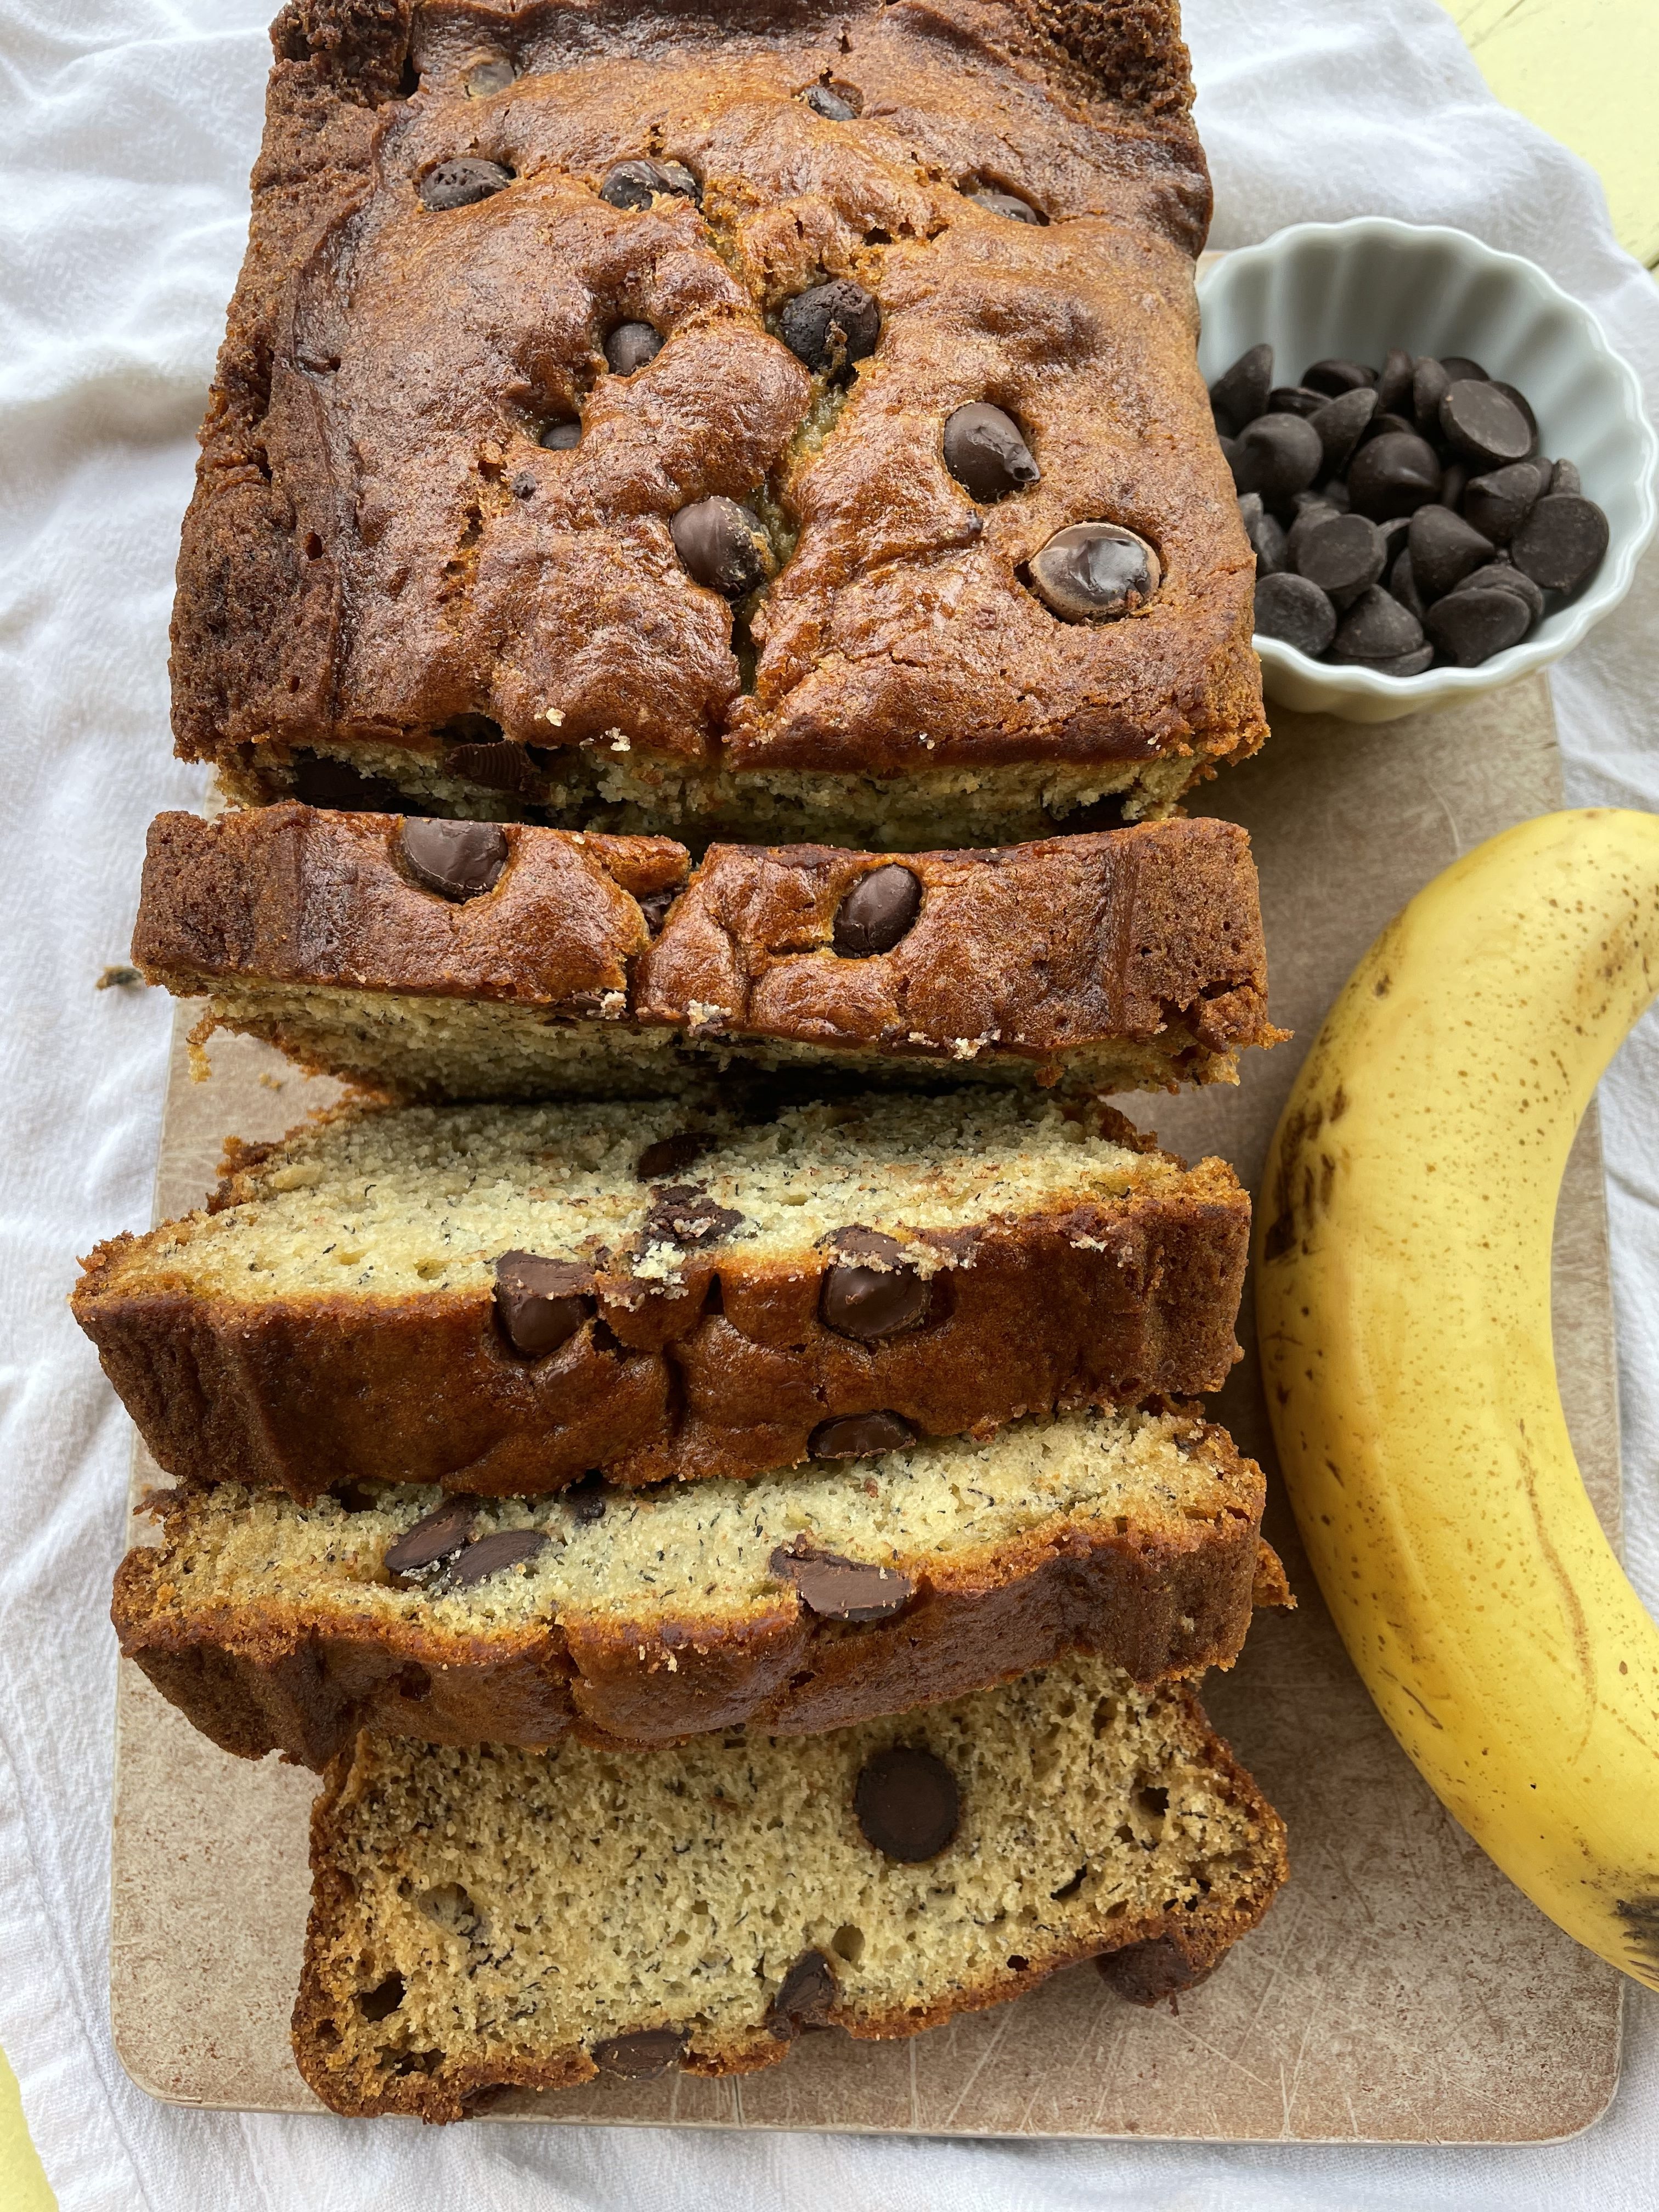
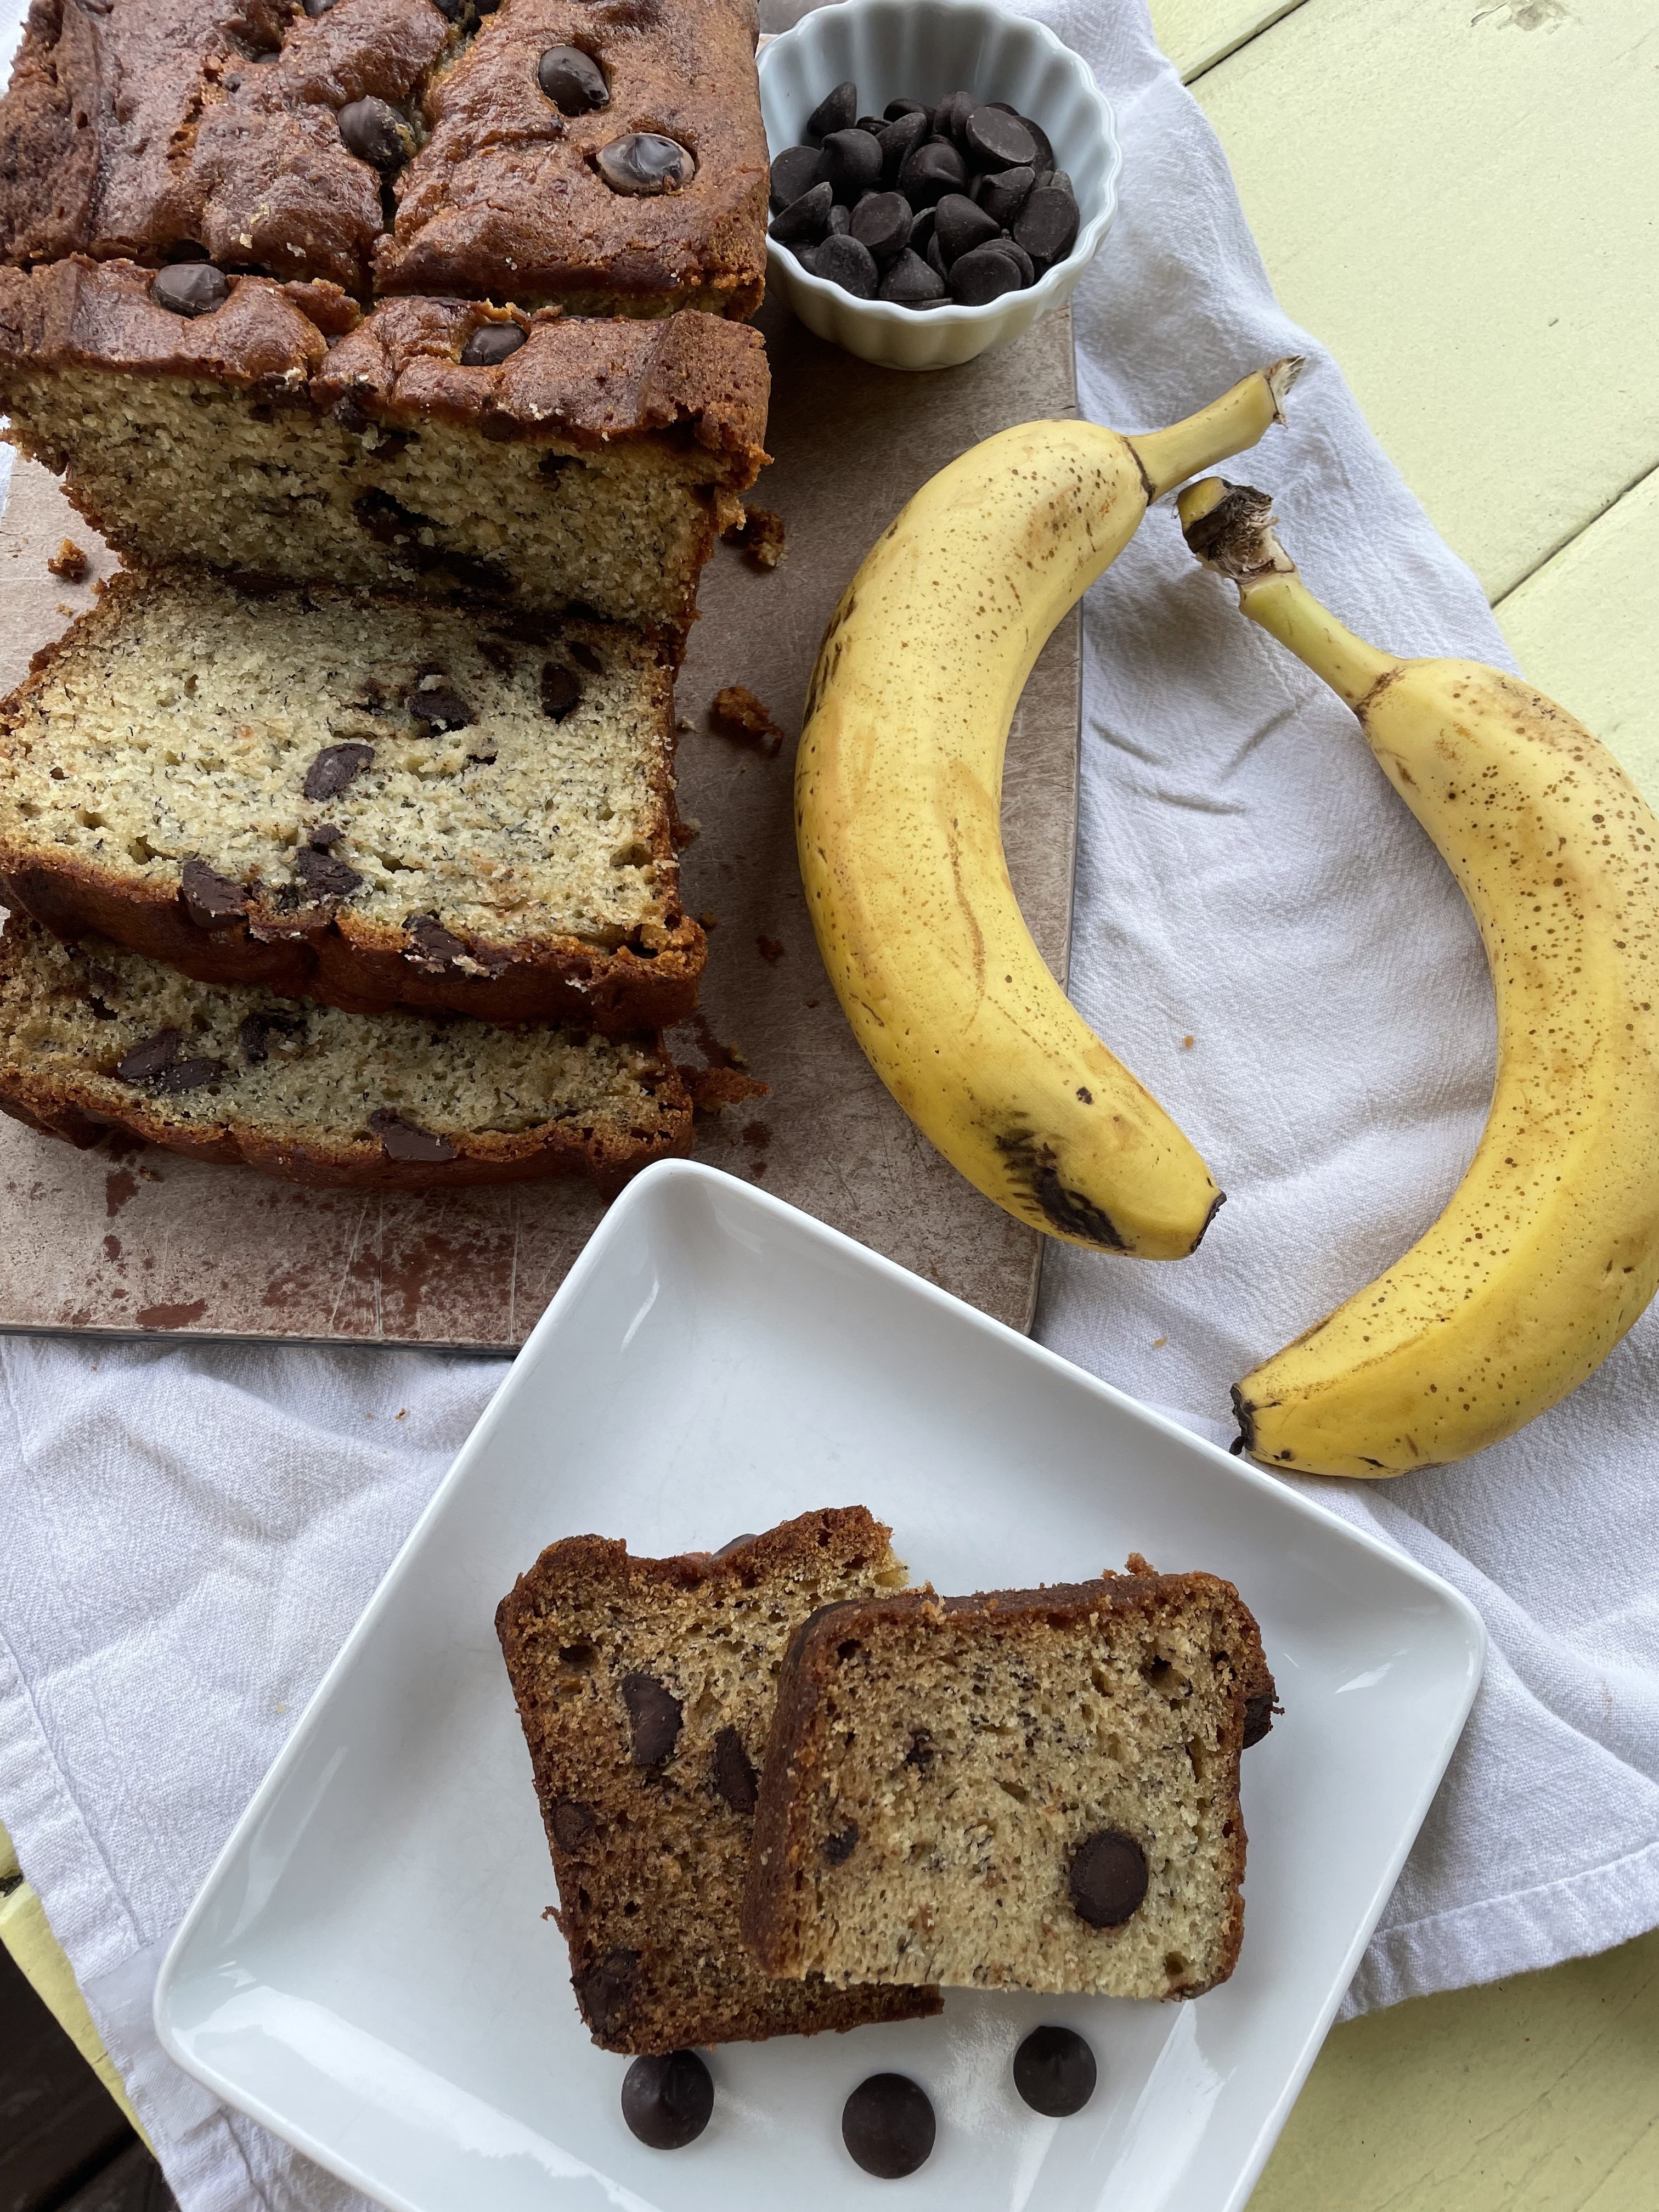
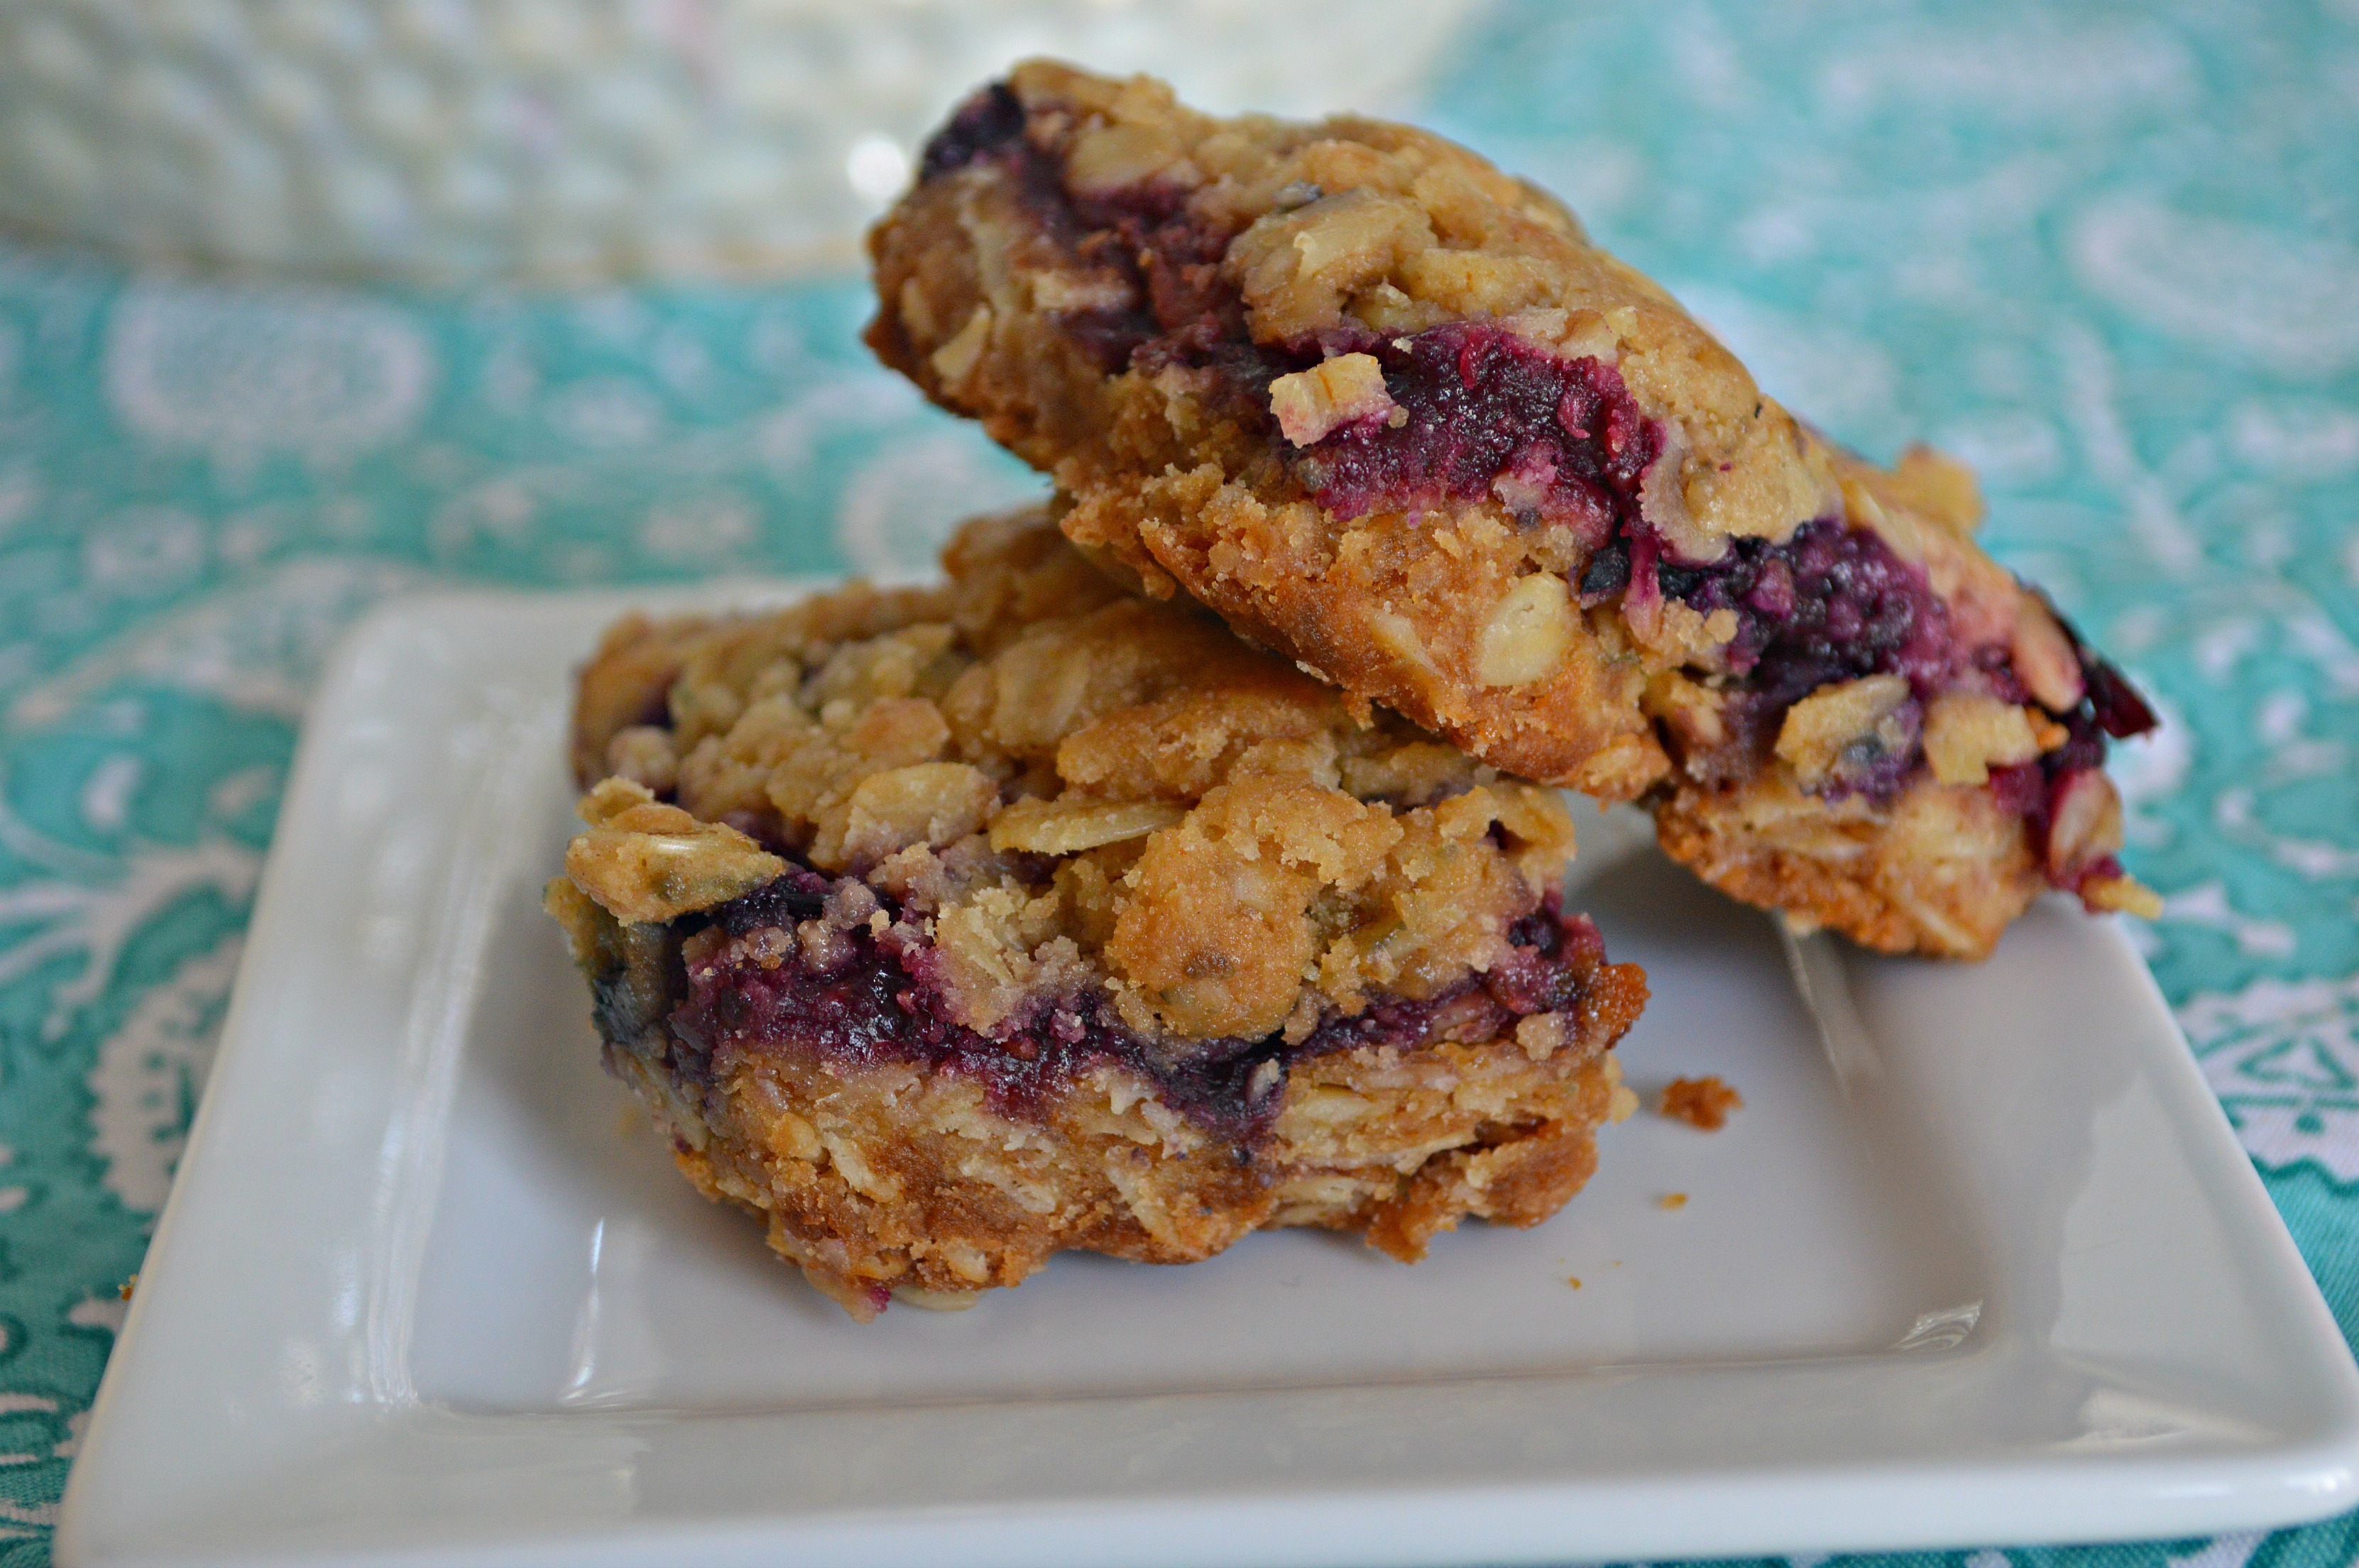
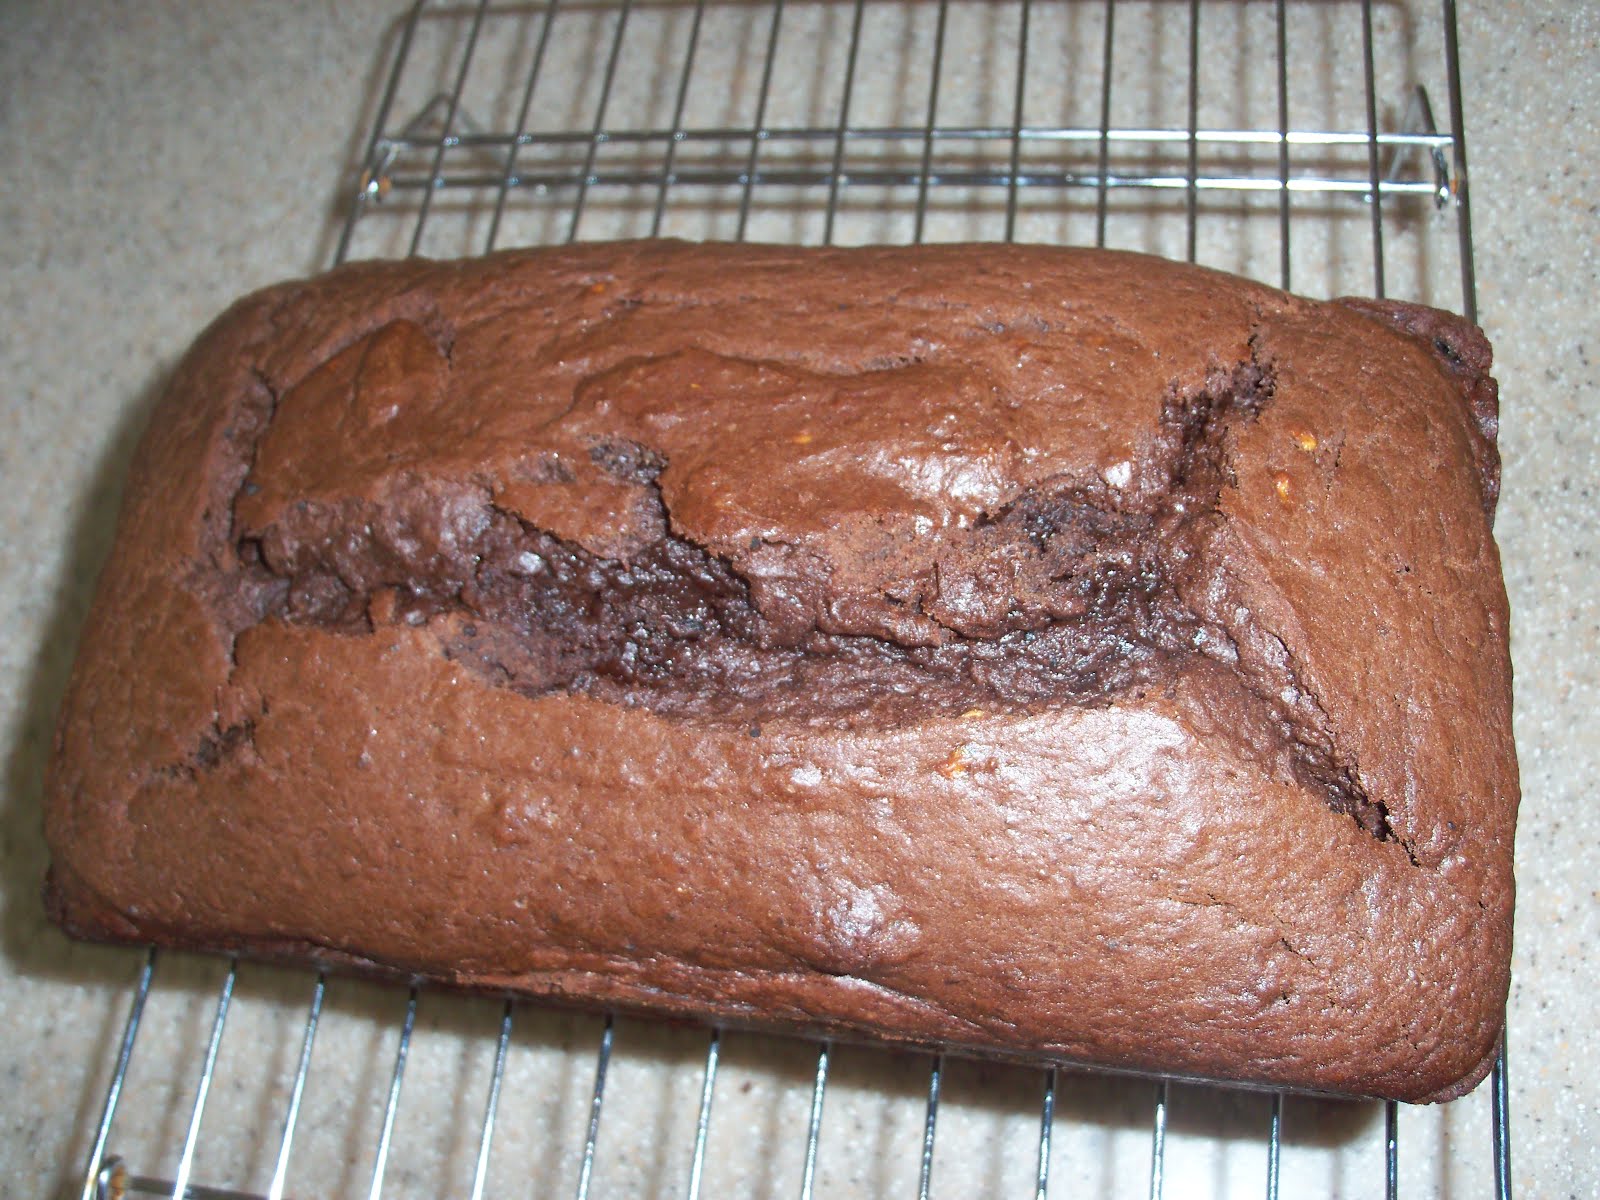
The first time I tried this recipe out of my Tyler Florence Ultimate Cookbook, it actually came out a little dry. Now, I am not saying anything bad about his recipe, I actually love most of his recipes and they always turn out wonderfully for me, but something about this didn’t work for me. I changed a few things up and made it again. The result was amazing. Soft, moist banana bread with a smooth chocolate taste. I think you will really enjoy this!
1/2 cup (1 stick) unsalted butter, softened
2 eggs
3 very ripe bananas, mashed
1 tsp vanilla extract
3/4 cup bittersweet chocolate chips or chopped chocolate, melted
2 cups all purpose flour
3/4 cup sugar
1/4 cup cocoa powder
1 1/2 tsp baking powder
1 tsp salt
1/2 cup buttermilk

In large bowl, cream butter until smooth. Add eggs, mixing well. Add in mashed banana and vanilla extract and combine. Pour in a little melted chocolate to temper the butter/egg/banana mixture. Stir. Pour in the rest of the chocolate and mix well. In a separate bowl, mix flour, sugar, cocoa, baking powder and salt. Add to butter mixture and beat until well combined. Add buttermilk and beat again. Pour into a greased loaf pan (batter will be very thick). Bake at 350 degrees for 60 minutes or until top is set. Cool in pan for ten minutes and then turn out onto wire rack. Cool completely. Feel free to sift some powdered sugar over the top before serving but it is delicious without it too!

Heather

Leave a Comment

Breads, Quick Breads and Rolls Desserts

Classic Chocolate Chip Banana Bread

This is one of the most popular things that I make for other people. To be clear, I make it so often for others that my kids wonder why I never make banana bread for my own family. It really is an easy, one bowl recipe that makes a deliciously golden loaf of tender and moist banana bread perfect for gifting, slicing, or eating warm out of the oven. I use Ghiradelli Chocolate Chips. This recipe is not at all affiliated with them, but I honestly believe that the big, delicious Ghiradelli Chocolate chips make this recipe even better. Follow the recipe as is, and don’t try to sub this for that. You will still get a loaf of banana bread…you just won’t get THIS banana bread!

Save Print
Classic Chocolate Chip Banana Bread
Author: Heather Williams
Recipe type: Breads
Cuisine: Dessert
Prep time:  15 mins
Cook time:  60 mins
Total time:  1 hour 15 mins
Serves: 1 loaf
 
This tender and moist banana bread will be sure to delight the pickiest of eaters. Perfect sweetness from the bananas complements the perfect cake like crumb. Dotted with chocolate chips takes this simple quick bread over the top!
Ingredients
  • 3 extra ripe medium sized bananas
  • ½ cup vegetable, canola or light olive oil
  • 1 cup sugar
  • 2 eggs
  • 2 cups unbleached, all-purpose flour
  • 1 tsp baking soda
  • ½ tsp baking powder
  • ½ tsp salt
  • 3 tbsp buttermilk
  • 1 tsp vanilla
  • 1 cup dark or bittersweet chocolate chips
Instructions
  1. Spray a standard sized loaf pan with baking spray and preheat the oven to 325 degrees. In a large bowl, mash bananas until no large lumps remain. Add oil and sugar. Beat well. Add in eggs one at a time and beat for about two minutes until pale yellow and light and fluffy. Sprinkle in flour, baking soda, baking powder and salt. Beat on low, scraping the sides of the bowl just until combined. Add buttermilk and vanilla extract and mix for thirty seconds. Add chocolate. chips, saving a small handful to dot the top of the loaf. Fold in with a spatula. Scrape batter into prepared loaf pan. Bake at 325 for 60 minutes (check bread at 45 minutes to see how it is doing - if looks close to being done, decrease time and check every five minutes until baked through). Check for doneness and remove from oven. Let sit in baking pan for ten minutes. Turn out onto cooling rack. If you cannot wait, help yourself, but the bread WILL fall apart. It is delicious though warm and everyone should experience this at least once! If you are saving for serving, let cool for one hour until you slice it. This bread stays fresh for three days wrapped well at room temperature. It also freezes wonderfully. Enjoy!
3.5.3251


Heather

Leave a Comment

Main Dishes Soups & Stews Vegetarian

Minestrone Soup


This is one of those recipes that has been in my family for a long time. I can remember my mom making a pot of this for Sunday dinner, and our mouths would be watering just smelling it simmering on the stove all afternoon. It was all we could do but wait for it to be ready, only to scoop up a big bowl, pile it with freshly grated romano cheese, and savor every bite. My family loves this soup too. I love it because besides all the chopping of the veggies, it is really easy to make, and filling since it is filled with all those veggies you had to chop. It is really flavorful, and the leftovers are even better! Sometimes I even change it up and add some crumbled Italian sausage or some delicious homemade meatballs. Keep it veggie friendly if you like, but if you are craving a little more protein, add your favorite to the soup and enjoy!

You will want to make a big batch and freeze some for another time. It takes a little while to prep and cook, but every bite is so worth it. Don’t leave out the thyme or the leek. They may seem insignificant, but their flavor seriously makes the soup.

Save Print
Minestrone Soup
Author: Heather
Recipe type: Soup
Cuisine: Dinner
 
This flavorful soup is filled with fresh veggies and is perfect for family dinner, and leftover lunches.
Ingredients
  • ¼ cup olive oil
  • 1 minced garlic clove
  • 1 onion, minced
  • 1 leek, washed and sliced thin
  • 1 tbsp. chopped parsley
  • 1 tbsp. dried thyme
  • 6 oz tomato paste
  • 1 can chopped tomatoes, undrained
  • 3 celery stalks, diced
  • 2 carrots, diced
  • 2 zucchini, diced
  • 6 cups chicken broth
  • salt pepper to taste
  • 1¼ cup white beans
  • Fresh, hot cooked pasta
  • Pecorino Romano cheese for sprinkling
Instructions
  1. Heat olive oil oil in large pot.
  2. Add garlic, onion, leek, parsley and thyme and cook until soft.
  3. Add tomato paste with two cans of water and cook for 5 minutes.
  4. Add all remaining ingredients except beans.
  5. Simmer, covered for 1 hour.
  6. Add beans and heat.
  7. Serve over hot cooked pasta and sprinkle with freshly grated pecorino romano cheese.
  8. Note : Cutting a leek can be challenging if you have never done it before. First, cut of the rough green stem. then slice the white part in half. Rinse WELL. Place flat part down on cutting board. Slice the long way twice and then slice across all the way down the leek. Repeat with other half.
  9. Note: Do not mix soup with pasta when storing. The pasta will soak up all of the liquid in the soup which will leave with more of a pasta dish when you come back to it the next day. This is also very tasty, but if you were hoping for soup, it can be a bit unexpected. Store soup and pasta separately.
3.5.3251

Heather

Leave a Comment

Soups & Stews

Cheeseburger Soup

I really love fall and winter foods. I love when the weather gets a little colder and it is okay to put on a pot of soup every night! Served with at salad and some crusty bread and it is such a great, easy, comforting meal. I have many favorites when it comes to soups. Some are healthy and stock full of veggies, others are creamy and a little more decadent. Whatever it is, soup always leaves you feeling warm inside and that is really what makes a good dinner.
This year, I tried out a new recipe I found in Cuisine at Home magazine. Have you ever read that publication? If not, you MUST try it. I have found a lot of my favorite recipes in there. I tried this recipe out and my middle daughter LOVED it. She loved it so much she wanted me to make it on her birthday. The doctor asked her at her yearly check up what her favorite food was and she said with a completely straight face, “Cheeseburger soup.” As if everyone had that at least once a week for dinner! This one is fun for the kids because it really tastes like a cheeseburger and it is fun to put the toppings on it since they are not the usual toppings for soup! Give it a try. My daughter swears you will love it!

Cheeseburger Soup

1 lb ground sirloin
1 cup onion, diced
3/4 cup celery, diced
1/2 cup carrot, diced
1 garlic clove, minced
3 cups chicken broth
2 cups yukon gold potatoes, peeled, diced
1 tsp dried basil
3 tblsp unsalted butter
1/2 cup all purpose flour
1 1/2 cups whole milk (I actually used skim milk to cut the fat a bit and it tasted great)
2 cups cheddar cheese grated (I did use lowfat here too and it was fine. DO NOT use fat free)
1/4 cup ketchup
2 tblsp mustard
salt and pepper to taste

Toppings :chopped pickles, relish, ketchup, mustard, chopped onion, shoestring fries

Brown the beef in a large pot over medium heat. Cook until the meat begins to brown, then add the onion, celery, carrot and garlic. Saute about 10 minutes. Stir in the broth, potatoes and basil. Bring to a boil, reduce heat and simmer 10-12 minutes or until potatoes are cooked through. In a small bowl, combine milk and flour. Add to simmering soup. Bring to a boil and reduce heat to simmer. Add cheese, ketchup mustard and salt and pepper stirring until cheese is melted. Serve with assorted toppings.

Note: we never used the fries as toppings because the potatoes in the soup are substantial. The pickles, ketchup and mustard though are delicious on top!

Heather

Leave a Comment

Christmas Cookies & Bars Desserts

Berry Pie Crumble Bars

berry pie crumble

I was planning the desserts for my daughter’s birthday party and was realizing that I had a lot of chocolate desserts…which do not misunderstand me….that is not really a “problem” per say…but….I thought I needed something a little different. I was thinking fruit….and spring. Something that reminded me that nicer weather was coming…and as I glance out the window and see the snow falling…I am hoping it comes soon! Blueberries came to mind. Fresh picked, sweet, plump and juicy blueberries. Yum! I decided on blueberry pie crumble bars and I and all my guests were pleased that I did. They were delicious. The blueberries were sweet and juicy and the “crumble” part of the bar was absolutely delcious. Buttery, crunchy and a perfect complement to the fruit. Try them out. You will not be disappointed. Hopefully every time one of us makes them, it will bring us closer and closer to spring…or even summer for that matter!

Save Print
Berry Pie Crumble Bars
Author: Heather
Recipe type: Cookie/Bars
Cuisine: Desserts
Prep time:  20 mins
Cook time:  30 mins
Total time:  50 mins
Serves: about 48 bars
 
This is an easy and delicious dessert recipe, filled with hearty oats, a buttery crumble and the sweet pop of fresh berries.
Ingredients
  • 2 cups oats (regular, not quick oats)
  • 2 cups all purpose flour
  • 1 cup brown sugar, firmly packed
  • ½ tsp baking soda
  • ½ tsp salt
  • 1 cup unsalted butter, melted
  • 2½ cups fresh or frozen mixed berries or one type of berries
  • ½ cup sugar
  • 3 tblsp water
  • 2 tblsp cornstarch
  • 3 tsp lemon juice
Instructions
  1. Heat oven to 350 and spray a 13x9 inch pan with cooking spray.
  2. Combine oats, flour, brown sugar, baking soda and salt.
  3. Pour in melted butter and stir until well mixed.
  4. If there is still a lot of dry ingredients, melt 1 more tblsp of butter and mix in.
  5. Reserve 1 cup of crumb mixture.
  6. Press rest of the mixture into pan with fingertips and bake for 10 minutes.
  7. Meanwhile, put blueberries, 2 tblsp of water and sugar in a saucepan and heat over low heat, uncovered, stirring occasionally until boiling.
  8. Cook for two minutes while boiling.
  9. Mix remaining tblsp of water, lemon juice and cornstarch in a small bowl.
  10. Stir into blueberry mixture and cook for one minute or until thickened.
  11. Remove from heat and let sit for 1 minute.
  12. Pour blueberry mixture over partially baked crust, spreading well ¼ inch from edge.
  13. Pour reserved crumb mixture over top, pressing down lightly.
  14. Bake for 20 minutes.
  15. Cool completely.
  16. Cut into squares and store in a tighly sealed container.
3.5.3208

*Note: You can eliminate 1/2 cup of oats and substitute 1/2 cup of chopped walnuts to give the bars and even heartier crunch.

berry pie 2

Heather

Leave a Comment

Main Dishes Pork

Italian Sausage with Pepper Sauce

I love Italian Sausage! Which is kind of funny, because I really don’t care for pork…at all. Something about Italian Sausage though…I just love it! This recipe is one of my favorites passed down to me from my mom. I used to love Italian Sausage sandwiches when I was a kid, topped with this delicious, simple tomato, pepper and onion sauce my mom would make. But nowadays, I like to spoon the sauce and sausage over some al dente pasta. I just made this for Sunday dinner with pasta and it was a big hit! The sweetness of the sauce paired with the spice of the sausage makes for a delicious dish the whole family will love! Accompany this with a green salad (topped with “homemade” roasted garlic caesar dressing!) and a loaf of crusty bread and your family can sit back, relax and enjoy a delicious family dinner!

Italian Sausage with Pepper Sauce

2lbs Italian sausage crumbles or sliced
1 red pepper, cut into chunks
1 yellow pepper, cut into chunks
1 orange pepper, cut into chunks
1 green pepper, cut into chunks
1 small onion, chopped
2 cloves of garlic, minced
1/4 cup olive oil
1/4 cup boiling water
1 can 16 oz diced tomatoes, undrained
3 tsp sugar
1 1/2 tsp salt
1 tsp basil
1 tsp oregano
Fresh cooked pasta
Romano cheese for serving

Brown sausage in large pan until just cooked through. Remove and keep warm on a plate. Add olive oil to pan, and cook peppers, onions and garlic for 5 minutes. Add water. Cook 1 minute. Add tomatoes, sugar, salt and spices. Simmer 30 minutes. Serve over hot pasta and sprinkle generously with romano cheese.

Heather

Leave a Comment

Breakfast

Green Smoothie


This is such an amazing way to get your kids to eat tons of fruit and a lot of healthy spinach!! My kids are great eaters, but one thing that is tough to get them to eat is spinach. This is a fun and tasty drink that my kids LOVE even after I told them there was spinach in there! (Coming clean about spinach in smoothie is optional!:) Try it! You will be hooked too on this delicious green smoothie or “Frog Juice” as my kids have now named it!

UPDATE 10/31/13: I now blend my spinach with 1 cup of orange juice, omit the honey and only do 1/2 cup pineapple and 1 banana. Try it this way, or the original way…either way, you will enjoy it! 🙂

Green Smoothie (AKA Frog Juice, Frankenstein Smoothie, Hulk Juice, Monster Drink…)

4 cups fresh spinach leaves
2 cups cold water
2 ripe bananas
1 cup frozen pineapple
1/2 cup frozen mango
1/2 cup frozen peaches
1/2 cup frozen strawberries
1 tblsp honey or agave nectar (optional)

In a blender or food processor, blend spinach and water until a smooth green juice is created. Add fruit little by little until completely blended. Add honey. Blend until completely smooth. Serve in clear glasses and sit back and enjoy watching your kids eat and love spinach!

Heather

1 Comment

Breakfast

Family’s Favorite Egg Casserole


This is a favorite around my house! I love making it for company for brunch, or our family on a special holiday morning. My family loves it so much, so I figured…let’s have it for dinner! I paired it with pumpkin muffins and a green smoothie for a delicious, well rounded and easy weeknight dinner! 🙂

Family’s Favorite Egg Casserole

Cooking spray
12 slices canadian bacon
10 slices swiss cheese
12 eggs
1 1/2 cups heavy cream ( I have also made it with fat free half and half and it turned out great!)
1 cup shredded parmesan cheese

Spray a 13X9 inch baking dish with cooking spray. Layer the canadian bacon on the bottom, covering the pan. Top with swiss cheese covering the canadian bacon. Crack eggs over the cheese so each slice is covered with egg. Pour heavy cream over top so just the peaks of the egg yolks are showing through. Sprinkle parmesan cheese on top. Bake at 400 degrees for 30 minutes or until cooked through and top is slightly browned. Take out of oven and let sit uncovered for five minutes. Slice into squares and serve warm.

Heather

Leave a Comment

Salads and Dressings

“Homemade” Roasted Garlic Caesar Dressing

100_8725.jpg

This is a fantastic, quick and easy dressing to make. Toss it with some crisp romaine lettuce and your favorite crunchy croutons and you have a delicious salad to pair with any meal. The best part? It tastes homemade but is a cinch to make!

“Homemade” Roasted Garlic Caesar Dressing

1/2 cup Caesar salad dressing
1/4 cup mayo
4 cloves roasted garlic (you can buy this bottled at the grocery store or roast your own : wrap 4 peeled cloves in foil with a drizzle of olive oil. Bake for 20-30 minutes at 350 until soft and fragrant)

Blend all ingredients in a blender. I pour into a mason jar. Refrigerate for 1/2 hour. Toss with your favorite salad. Keep refrigerated.

Heather

Leave a Comment

Side Dishes Vegetables and Fruit Vegetarian

Quick and Healthy Rice and Beans

I love quick and easy recipes that I can throw together in a snap. Sometimes it is so busy in the evenings around here that I need something quick, easy and preferably healthy and wholesome. This is a vegetarian recipe too, which I like to serve my family every once in awhile, but if you must have the meat, you could brown some lean ground beef or turkey while you are sauteeing the peppers. Serve it with some sliced mango on the side and you have a well rounded, healthy meal that your whole family will enjoy!

QUICK AND HEALTHY RICE AND BEANS

1 tblsp olive oil
1 red bell pepper, diced
1 orange bell pepper, diced
1 yellow pepper, diced
3/4 cup diced red onion
2 cans of diced tomatoes, undrained
1 tblsp chili powder
1 tsp garlic powder
1 tsp cumin
2 tsp salt
2 cups cooked white or brown rice
1 can of black beans, drained and rinsed
2 cups lowfat cheddar cheese, shredded

Pour olive oil in large saute pan. When hot, add peppers and onions and saute until softened. Add diced tomatoes. Stir. In separate, small bowl, mix together chili powder, garlic powder, cumin and salt (you can use 1 packed of low sodium taco mix if you are pressed for time or don’t have the ingredients on hand). Sprinkle mixed spices in pepper, tomato mixture. Stir. Add rice and beans and heat for 1 minute. Sprinkle cheese on top. Cover pan. Cook for 3 minutes. Turn of heat, and leave covered for two additional minutes. Serve warm.

Heather

Leave a Comment

  • « Previous Page
  • 1
  • …
  • 35
  • 36
  • 37
  • 38
  • Next Page »

Heather

I am a midwestern girl who grew up in the big city, but now enjoys her days as a stay at home mom in the suburbs. Who says spending time in the kitchen has to be boring? I hope to inspire your family kitchen with some new ideas, fun recipes and great tips.

Stay Up to Date

Get all the latest tasty goodness straight to your inbox!

Girl and her Kitchen

Join us!

Hey! I am the GIRL in the kitchen and I am so glad you decided to visit. Love to cook and eat? You will find some great recipes on this site, whether you are looking to eat healthy, splurge on a dessert, make dinner or host a party-I have it all! Sometimes I’ll give you a story along with my recipe, other times, I want to take you straight to the food!  Whatever the reason that you decided to visit, I am so glad you joined me in the kitchen! Feel free to take a look around the site, and please…stay awhile!

Archives

Popular Categories

  • Appetizers
  • Breakfast
  • Crafts
  • Salads and Dressings
  • Side Dishes
  • Vegetables and Fruit

Most Popular Posts

Corner Bakery Cafe Giveaway!

Corner Bakery Cafe Giveaway!

Filed Under: Reviews

Bacon Cheddar Skillet Cornbread

Bacon Cheddar Skillet Cornbread

Filed Under: Breads, Quick Breads and Rolls, Side Dishes

Puffy Pancakes {Perfect for Valentine’s Day!}

Puffy Pancakes {Perfect for Valentine’s Day!}

Filed Under: Breakfast, Valentine's Day

100 Days of Real Food Cookbook Review {and Giveaway!}

100 Days of Real Food Cookbook Review {and Giveaway!}

Filed Under: Vegetarian

Copyright © 2025 · Divine theme by Restored 316