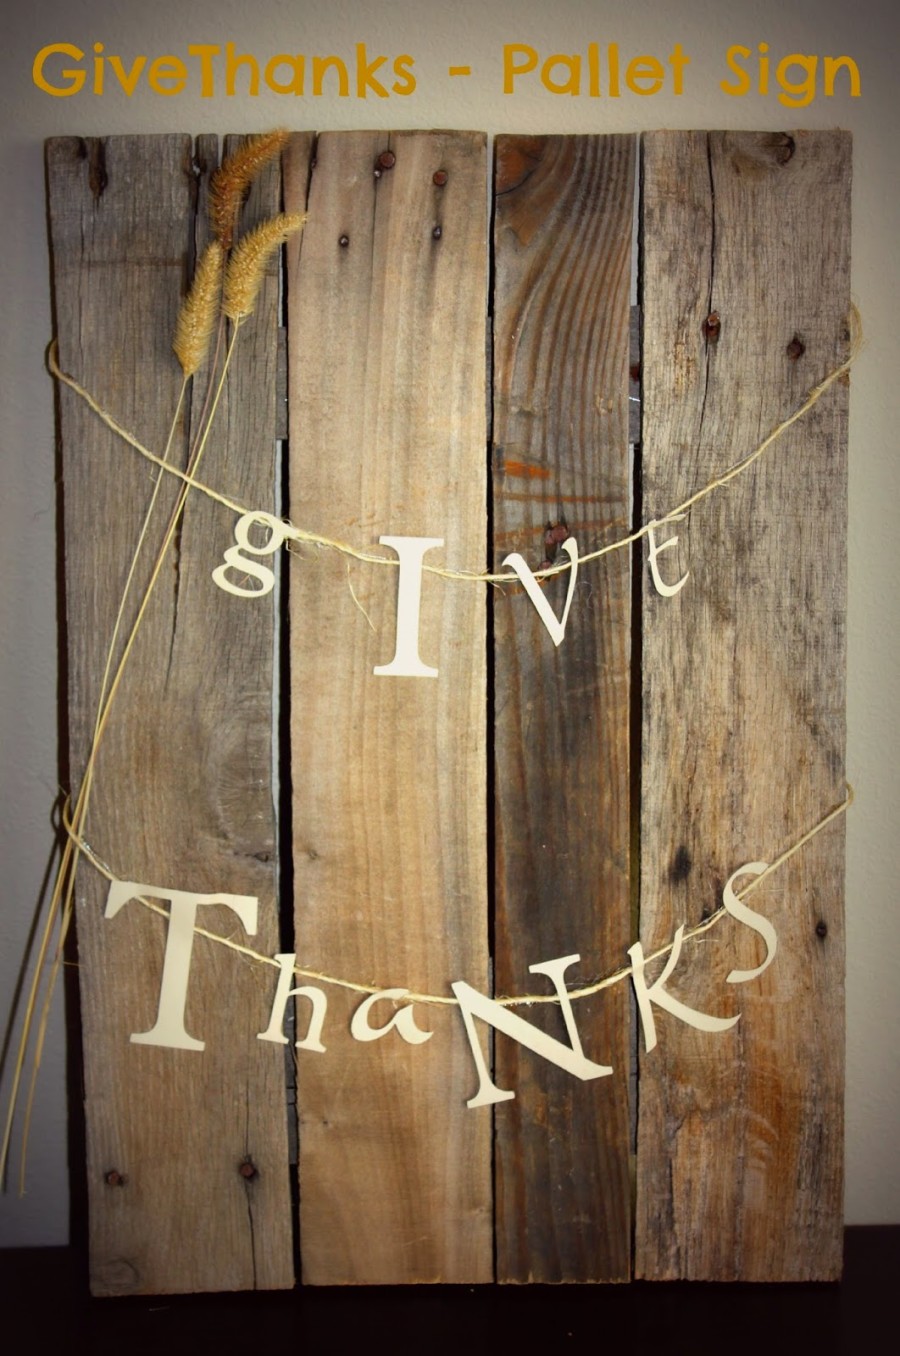
Who doesn’t love free pallets, fall, and THANKSGIVING?! My sister-in-law Kiersten and I made these beautiful rustic Thanksgiving pallet signs from some free pallets stacked by a shop. Kiersten saw them lying around, asked if she could snag them, and threw them into the back of her car. Serious score on her part! I love that pallets are versatile and can make any project have a lot of character. The wood is always beautiful and no two pieces identical with knots and nails to make them interesting. We also have a lot of wheat fields where I live so I simply grabbed a few pieces growing on the edge of the road by my house. Craft stores also carry these though and they are usually pretty inexpensive.
I love Thanksgiving and I love thinking about all the things I’m grateful for. Having this sign up is a good reminder to me each day to have a heart of thanksgiving. When I’m thankful for all the little and big things in my life I’m soooo much happier! God blesses me daily and its good to have a reminder to be humble and truly give thanks for all I have.
Supplies:
Pallet wood- you’ll need about half of a pallet (I cut my four front pieces to 20in long and back two to 13in because that was how wide my four boards side by side ended up being)
Crowbar/Hammer
Saw
Glue and Glue Gun
Twine or Yarn
Paper- I used cardstock for the letters
Dried Wheat or Leaves
Let’s do this:
1. Disassemble pallet. Try to leave the nails intact so that they can be seen on your sign. I did this with a crowbar/hammer. Once the pieces were apart I bent the nails on the backside of the wood so I wouldn’t get poked by them and could still see their tops on the front side.
2. Cut four pieces to the desired height of your sign. I cut mine at 20in. Some of the pieces had different widths. This is totally ok and adds more character and asymmetry to the final product.
3. Cut two pieces that will go on the backside and hold all the front pieces together. I got this length by lying my four cut pieces side by side then laying the back piece across them and marking where it needed to be cut. Mine ended up being 13in long.This is how the back looks. I purposefully placed my pieces with gaps in between. Make sure you cut your back pieces long enough to span the entire width of the sign.
4. Glue you back pieces onto the back of your four main pieces. Use enough glue to make sure they stick together, but not so much that is oozes through and you see it in your gaps (that would be sad).
5. The letter part for me was pretty easy because I have a cricut. If you don’t have one, have one of your friend that has one cut the letters for you, or do it the old fashioned way and stencil then cut out your letters. You could easily print off the letters with your computer and cut them from that. If I don’t have the cricut or I want a specific font I’ll print my letters out, tape the paper to a bright window, place my cardstock on top of that, and then trace my letters. When I’m all done tracing I cut it out with scissors or the sword of exact-zero (aka: razor blade for all the non-Lego Movie lovers). I chose letter heights from ranging from 1-4in both upper and lower case with some italics and some normal for my pallet sign.
 |
| Sorry for the chipped nails, but you get the idea! |
6. Cut two pieces of twine and drape them across the front of your sign to the desired placement, I swooped mine so the letters look like a little dangling banner. Using a light hand, glue the twine in the back (see picture of back of the sign) and then in a couple of places in the front so your “swoop” doesn’t move.
7. Glue your letters to the twine so that they are dangling.
8. Adorn with dried wheat or leaves.
9. Hang in a prominent place so you can enjoy your handy work and remember to give thanks every single day (mine is in the kitchen).


Leave a Reply