• Email
    • Facebook
    • Instagram
    • Pinterest
    • Twitter

Girl and Her Kitchen

Plan. Make. Eat. Design. Craft. Create. Celebrate. Life.

  • Home
  • About the Girl
  • Recipe Index
  • We LOVE
  • Weekly Menu

Candy Christmas Desserts

Homemade Marshmallows

killer homemade marshmallows
I once saw a sign that read “Money can’t buy happiness, but it can buy marshmallows, which is pretty much the same thing”. We feel the same way in our house, but not just any ole marshmallow will do.

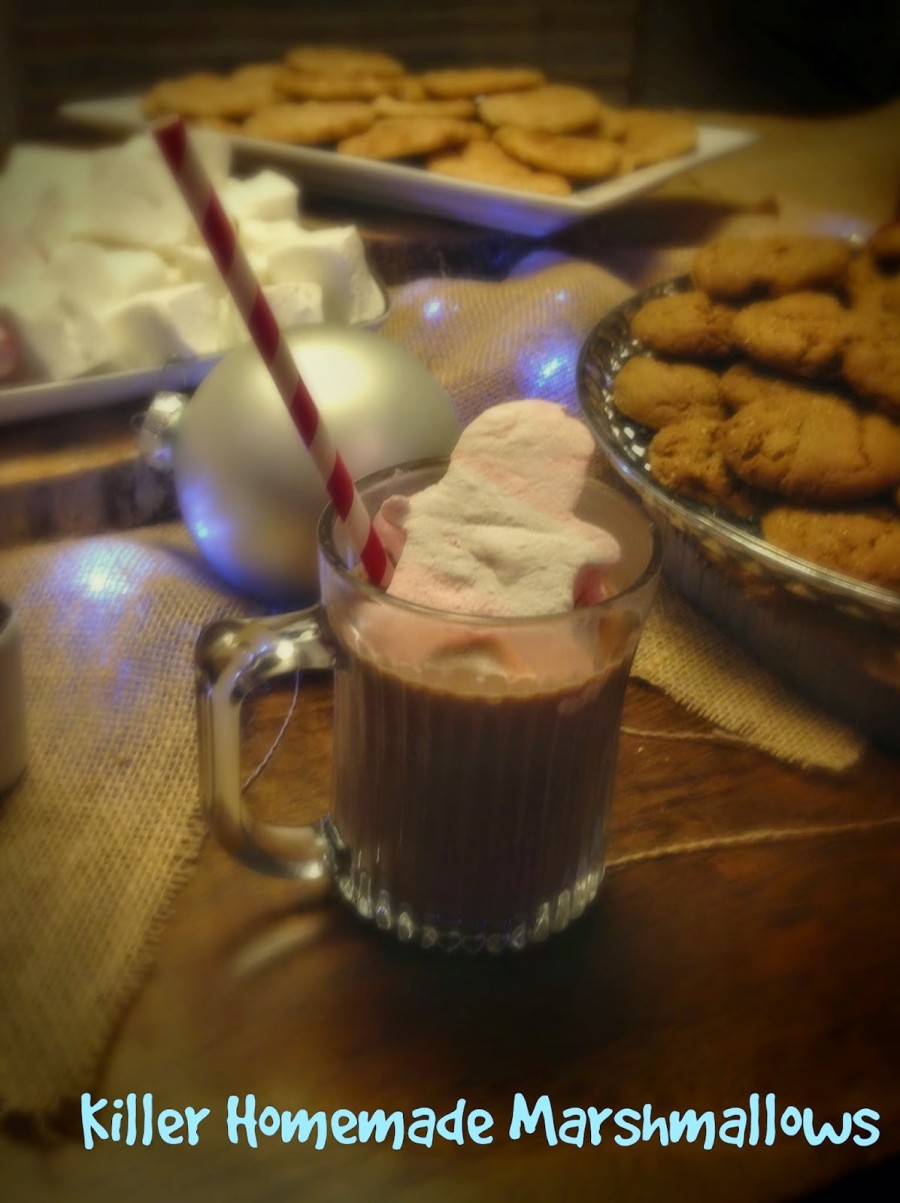
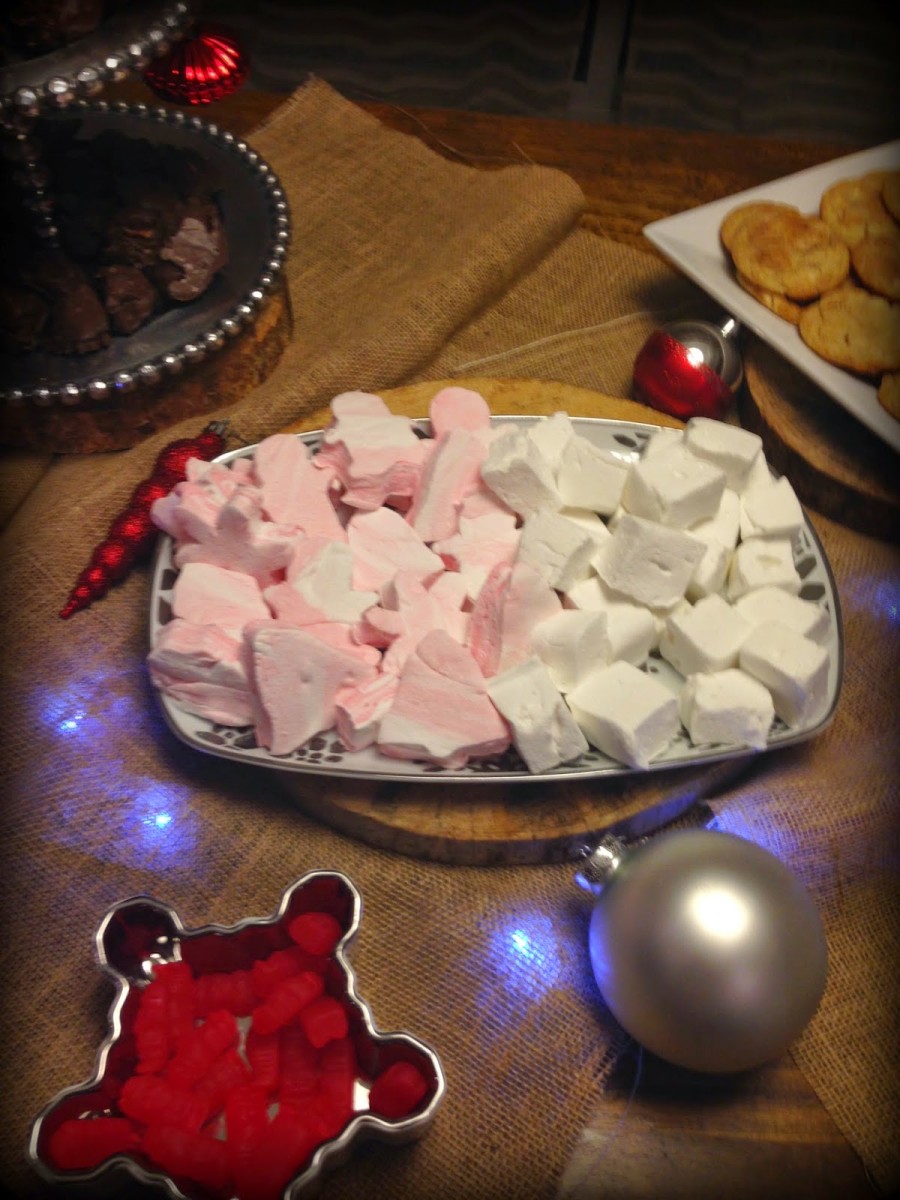
True happiness is my homemade marshmallows every Christmas season. They are easy, and fun, and you can dress them up as little, or as much as you want. My family prefers them flavored with vanilla and then dipped in chocolate and sprinkled with candy canes or sprinkles. You can easily substitute the vanilla for some peppermint extract and add a little red food coloring and – voila! Peppermint marshmallows. They are the creamiest marshmallows for your hot cocoa so beware, if you make these you will not want to buy store bought again!

I originally got the recipe from the food network from Alton Brown.The link to the original is here: Alton Brown homemade marshmallows. The marshmallows featured here were some I did for a “favorite things party” with some of my girlfriends.

We had a hot cocoa bar.

Can I say yum?

Killer Homemade Marhsmallows
(adapted from Alton Brown Food Network’s Homemade Marshmallow recipe)

Here’s what you’ll need:
Saucepan with lid
Standup mixer
Candy thermometer
13×9- in dish

Ingredients:

3 packages unflavored gelatin (I wish knox)
1/2 cup ice cold water
1/2 cup lukewarm water
12 ounces granulated sugar, approximately 1 1/2 cups
1 cup light corn syrup
1/4 teaspoon kosher salt
1 teaspoon vanilla extract (substitute a couple drops of peppermint extract here if you want peppermint flavored mallows)
1/4 cup confectioners’ sugar
1/4 cup cornstarch
Nonstick spray

Directions:

Put the gelatin  into the bowl of a stand mixer with whisk attachment along with 1/2 cup of cold water to bloom the gelatin.
In a small saucepan combine the remaining 1/2 cup of lukewarm water, granulated sugar, corn syrup and salt. I stir it here, but not again. Place over medium high heat, cover and allow to cook for 3 to 4 minutes. Uncover the saucepan, clip a candy thermometer onto the side of the pan and continue to cook until the mixture reaches 240 degrees F, approximately 7 to 8 minutes. (NO STIRRING, just let it come to 240 degrees F). Once the mixture reaches this temperature, immediately remove from the heat.

Turn the mixer on low speed and, while running, slowly pour the sugar syrup down the side of the bowl into the gelatin mixture. Once you have added all of the syrup, increase the speed to high. Continue to whip until the mixture becomes very thick and is lukewarm, approximately 12 to 15 minutes. Add the vanilla during the last minute of whipping. You could substitute the vanilla for a couple of drops of peppermint extract if you want peppermint flavored marshmallows. For the peppermint marshmallows I also add a couple of drops of red coloring once it is done mixing and incorporate it with a spatula to get a more marbled look. While the mixture is whipping prepare the pans as follows:

For regular marshmallows:
Combine the confectioners’ sugar and cornstarch in a small bowl. Lightly spray a 13 by 9-inch metal baking pan with nonstick cooking spray. Add the sugar and cornstarch mixture and move around to completely coat the bottom and sides of the pan. Return the remaining mixture to the bowl for later use. For miniature marshmallows prepare a cookie sheet in the same way instead of a 13×9-inch pan.
When ready, pour the mixture into the prepared pan, using a lightly oiled spatula for spreading evenly into the pan. I simply spray my spatula with nonstick spray because these mallows are sticky! Dust the top with enough of the remaining sugar and cornstarch mixture to lightly cover. Reserve the rest for later. Allow the marshmallows to sit uncovered for at least 4 hours and up to overnight.
For miniature marshmallows I pipe the marshmallows using a cake decorating bag and tip, into long tubes of marshmallow goodness, lightly dusting with more of the powdered mixture. To put the marshmallow fluff into the piping bag I place the bag in a large tall cup and pull the bag down around the lip of the cup so that the bag is resting open in the cup (no hands!). This allows me to use both of my hands to pour the sticky mixture inside the bag. Its great! Then I pipe them out into long tubes and let them dry. Once they have dried for a couple hours I cut them into miniatures using kitchen shears. Yum!
For the regular marshmallows, turn them out of the 13×9-inch pan and onto a cutting board and cut into 1-inch squares using a pizza cutter dusted with the confectioners’ sugar mixture. Once cut, lightly dust all sides of each marshmallow with the remaining mixture, using additional if necessary. I just lightly toss them with my fingers to get them coated. Store in an airtight container for up to 3 weeks (if they last that long). Instead of the pizza cutter you can use cookie cutters and make the marshmallows into all sorts of cute shapes. This is a great time to involve the kiddos. My son loves to help with this part.
To jazz these marshmallows up you can always dip them in chocolate! After the marshmallows are cut  you can warm up some dipping chocolate and while holding one end of the marshmallow dip the other end into the chocolate. While the chocolate is still warm on the marshmallow sprinkle on some broken candy cane pieces, sprinkles, or drizzle them with melted white chocolate. Let the chocolate harden on parchment paper. You can throw them in the fridge on a plate also to get them to harden quickly, but make sure they get into an airtight container afterward. You do not want this creamy goodness drying out and getting hard. If you like peeps you could pipe these marshmallows onto a sheet of parchment paper that is covered in fine colored sugar and make your own! These marshmallows are also a great and unexpected addition to your candy or cookie plates.

homemade marshmallows

Believe me you will not regret adding these to your yearly Christmas traditions. Merry Christmas and enjoy a cup of cocoa with these killer mallows!
On a side note my awesome nieces and nephews did a cup-for-a-can cocoa stand and collected a large amount of food and donations for the local food bank. We brought our cans of food and were rewarded with a cup of delicious cocoa. It was such a beautiful way to spread love this holiday season.
Print Friendly, PDF & Email

Heather

Leave a Comment

« Mixed Nut Brittle
Happy Everything! »

Leave a Reply Cancel reply

Your email address will not be published. Required fields are marked *

Heather

I am a midwestern girl who grew up in the big city, but now enjoys her days as a stay at home mom in the suburbs. Who says spending time in the kitchen has to be boring? I hope to inspire your family kitchen with some new ideas, fun recipes and great tips.

Stay Up to Date

Get all the latest tasty goodness straight to your inbox!

Girl and her Kitchen

Join us!

Hey! I am the GIRL in the kitchen and I am so glad you decided to visit. Love to cook and eat? You will find some great recipes on this site, whether you are looking to eat healthy, splurge on a dessert, make dinner or host a party-I have it all! Sometimes I’ll give you a story along with my recipe, other times, I want to take you straight to the food!  Whatever the reason that you decided to visit, I am so glad you joined me in the kitchen! Feel free to take a look around the site, and please…stay awhile!

Archives

Popular Categories

  • Appetizers
  • Breakfast
  • Crafts
  • Salads and Dressings
  • Side Dishes
  • Vegetables and Fruit

Most Popular Posts

Corner Bakery Cafe Giveaway!

Corner Bakery Cafe Giveaway!

Filed Under: Reviews

Bacon Cheddar Skillet Cornbread

Bacon Cheddar Skillet Cornbread

Filed Under: Breads, Quick Breads and Rolls, Side Dishes

Puffy Pancakes {Perfect for Valentine’s Day!}

Puffy Pancakes {Perfect for Valentine’s Day!}

Filed Under: Breakfast, Valentine's Day

100 Days of Real Food Cookbook Review {and Giveaway!}

100 Days of Real Food Cookbook Review {and Giveaway!}

Filed Under: Vegetarian

Copyright © 2025 · Divine theme by Restored 316