
The 4th of July is one of my favorite holidays. It also happens to be my birthday. When I was little I told my mom how nice it was of everyone to celebrate my birthday and to do fireworks. Apparently everything is about you when you’re five. Over the years, I learned it wasn’t all about me and it was about our beautiful country becoming independent! I am truly grateful to live in this country where freedoms exist to bless us and allow us to pursue our dreams for ourselves and our families.
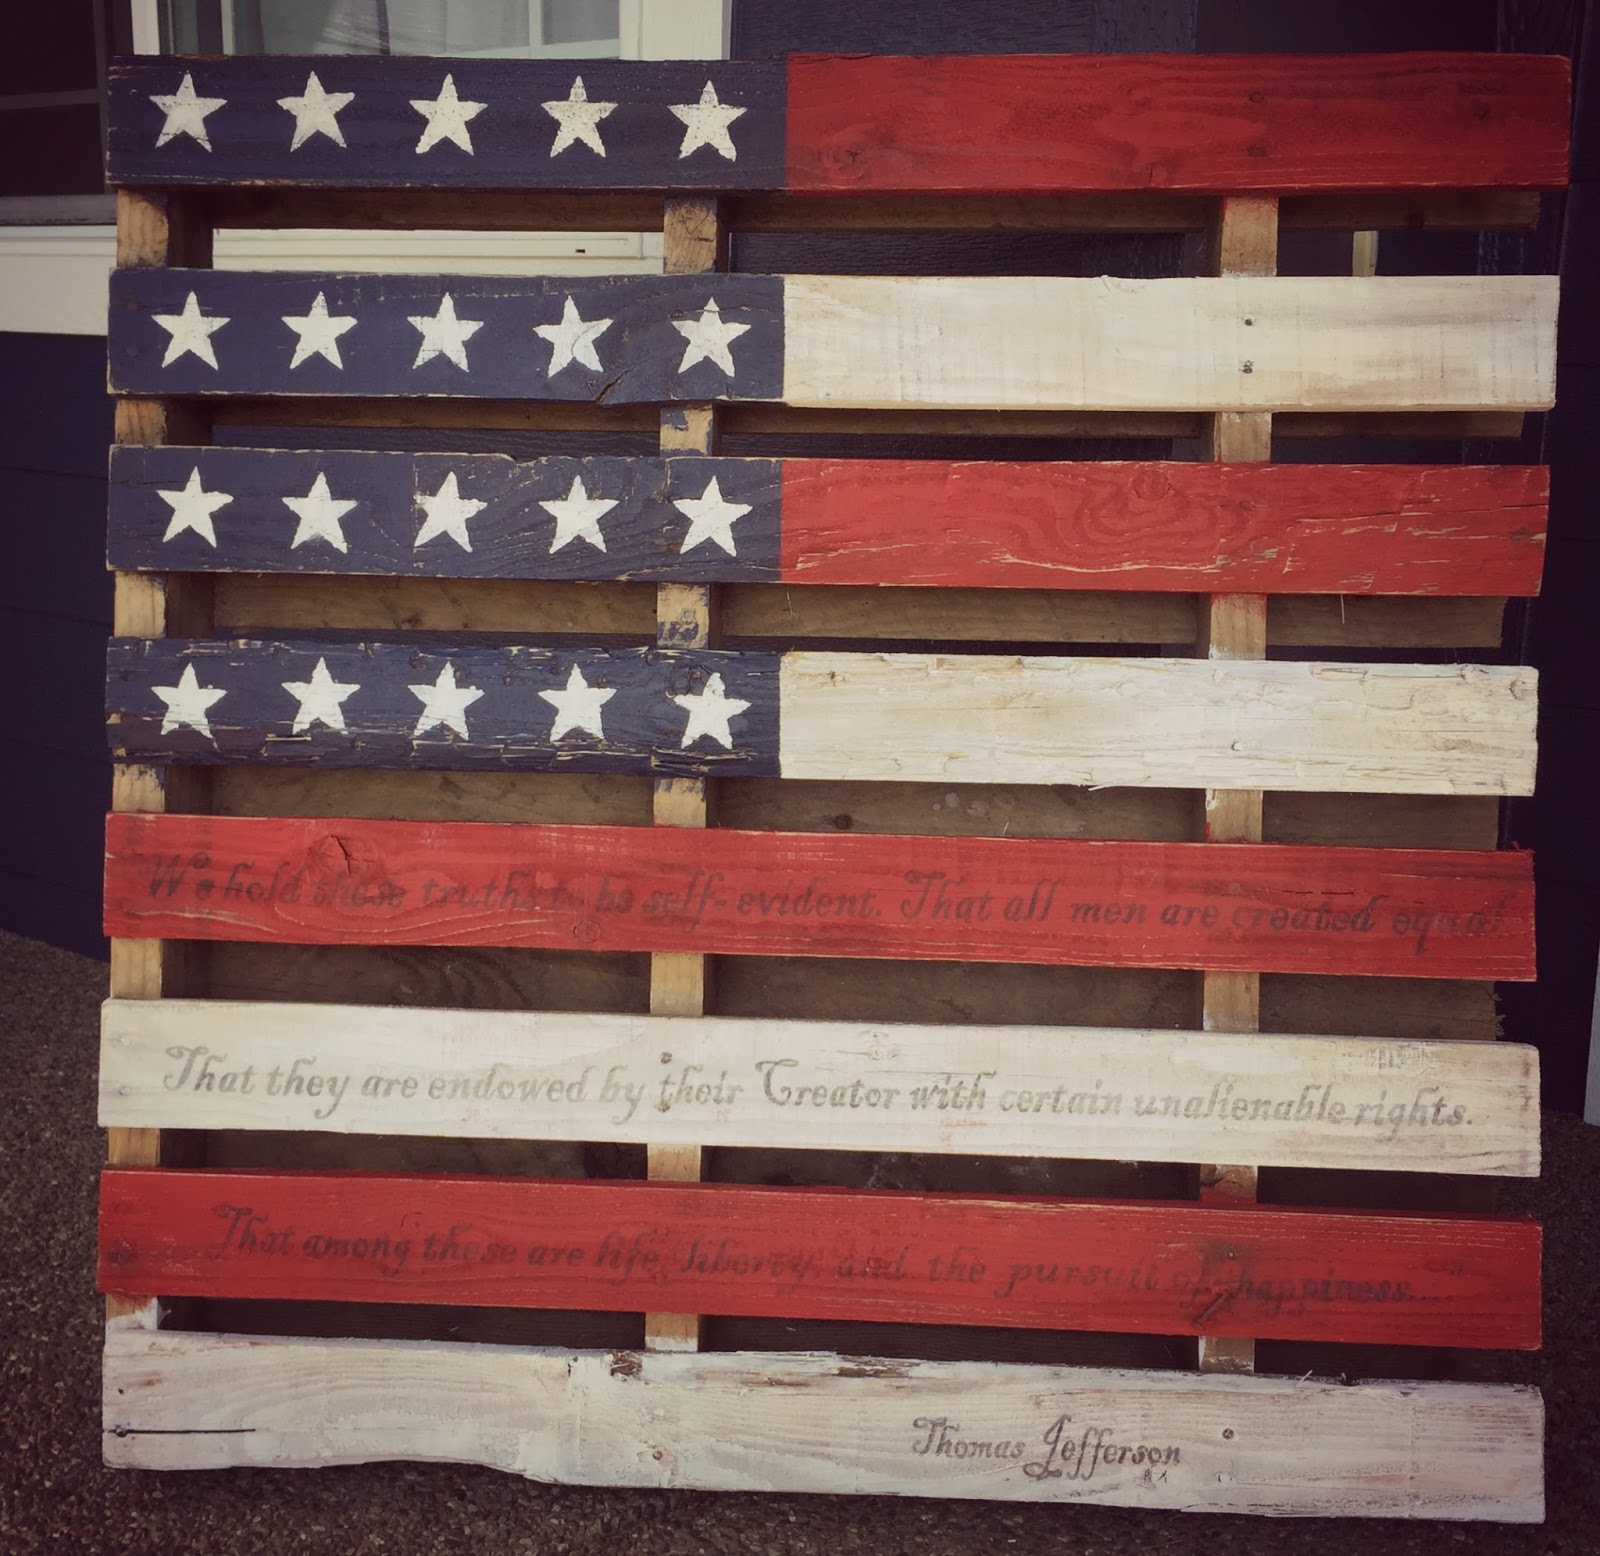
In honor of the 4th coming up, I wanted to make a craft/piece of art that would display my patriotism and loyalty to our country. What better way than through a flag! I saw this flag created before, but had to try it out myself. It was fast and fun, and is now a beautiful addition to my front porch.
Materials:
-Pallet of wood (I used an older pallet with discoloration and knots. Since I have men working on our house I asked that they just leave it since they were going to throw it away. It worked great, but you could easily use a brand new one.)
-Paint/paint brushes (The exterior of my house just got painted a beautiful navy blue, so I had about 12 samples of blue to pick from and used a Sherwin Williams color called Naval and just some red and white acrylic craft paint I had already from previous crafting.)
-Painter’s tape
-Star stencil or dye cut out
-Gel stain (if antiquing)
-Sand paper (again, if antiquing) I used 100 grit because my wood was pretty hard and I wanted to really give it a distressed look.
Instructions:
Step 1: Clean your pallet if its old or dirty. I just hosed mine off and let it dry in the sun. I wanted to make sure my paint would stick without any dirt getting in the paint.
Step 2: Tape off the area you would like blue and paint it. If you’re going for an antiqued look like mine, don’t worry about painting it perfectly or too thick. A little wood grain is nice to see. The paint could even be watered down a little to give it more of a whitewash look.


Step 3: Let the blue dry then place a strip of paint over the blue edge and get to painting your white and red strips.

Step 4: Add your stars! I used my Cricut to cut out my stars using cardstock to make a stencil. You can buy a stencil or simply cut out stars from a clipart print out. There are hundreds of star images on clipart online.


When painting your starts try to have a pretty dry brush so that you don’t get huge blobs of paint seeping under your stencil. I did two light coats so that I could avoid the nasty blobs! You could also use a sponge brush here. whatever you have on hand.

Now that your stars are done, you can stop with your beautiful project right here or you can continue on by adding a favorite patriotic phrase along with some gel stain and sanding for an antiqued look.
Step 5: Add your favorite patriotic phrase.
So, I’m not going to lie, this was the most time consuming part of the project. Of course I had to choose the longest quote ever and of course I was stuck with an outdated version of Microsoft Word that was a beast to work with. The good news is, I prevailed and no computers were harmed in the process. I saw this adorable piece of art work on Pinterest, which can be found at kohls for $144.99 and immediately wanted to put the quote from the Declaration of Independence on my pallet (but seriously, who wants to spend $144.99 when they could spend nothing!?)

I followed this tutorial for my letters. I’ll be honest….it was a little bit of a trial to figure out how wet you needed the paper to be in order for the transfer to occur. Once I got that down it was great. It worked wonderfully on the white paint, but not as great on the red. So after I was done rubbing and wetting the paper I made a watercolor/inkwash out of some black and cream acrylic paint but mixing them with some water and then painted this over where I felt I wanted the letters a little darker. This was not a big deal for me because I love to paint, but if you are using this technique and don’t like to paint either only do it on the white, do a smaller quote, or just be happy with the antiqued look you get with the faded letters. If you choose not to use this technique you can always freehand paint your quote on or use a stecil/dye cutting machine. Here are some pictures of me doing the process:

After I printed off my mirrored version of my quote which I ended up printing from Microsoft Publisher, I cut and taped them together to fit nicely on my pallet. I will say nothing helps a project like some good jams. I personally love a little Andrew Belle and Mat Kearney.

Here are my words laid out ready to be wet and rubbed off with a sharpie marker lid.


I was very pleased with the finished product and even more pleased with the price! Our painter came by today to touch up some things on the exterior of our house and said “Wow is that the crate I left you? That looks like something you would find at Pottery Barn.” That’s mission accomplished in my book.

I chose to use some inspiring words from the Declaration of Independence but you could paint on “God Bless America” or the Pledge of allegiance. You could just leave it at the flag without any words. The choice is yours. Let us know what you did with your American Flag Pallet Art project. You can also share why you’re grateful to live in this beautiful country.
Happy Crafting!

Leave a Reply